I was standing in front of my closet this morning, debating whether I really needed another striped tee from Target, when I remembered something: every dollar I spend there (and at Best Buy, Apple, Walmart — you name it) can come back to me through Rakuten. And right now, signing up is the best deal they’ve ever done.
Here’s the thing. Rakuten — formerly Ebates, if that name rings a bell — is offering a $50 cash back welcome bonus for new users who spend just $50 within 90 days. That is literally 100% cash back on your first $50 in qualifying purchases.
The last time I checked, the standard welcome bonus was $30, occasionally bumping up to $40. There was also an older “up to $50” offer, but that one only gave you 10% cash back capped at $50. This current flat $50 bonus is different — and honestly, it’s the highest welcome bonus I’ve ever seen from them.
Shop through Rakuten. Start at Rakuten.com, pick any of their 3,500+ partner stores (Target, Sam’s Club, Best Buy, Apple, Walmart, Kohl’s, Macy’s, Lowe’s, giftcards.com — the list goes on), and click through to shop as usual.
Spend $50 or more within 90 days of joining. Your purchases can be spread across multiple orders or done in one go.
Once you hit that $50 threshold, the bonus gets deposited into your Rakuten account along with any regular cash back earned on those purchases.
The Fine Print
You need to be a new member and located in the 50 United States or D.C. Qualifying orders must total at least $50 within 90 days of signing up. The offer can be modified or cancelled anytime, so if you’ve been meaning to join, now is as good a time as ever.
Getting Your Money
Rakuten pays out via mailed check (that’s what I opted for), PayPal, or Amex Membership Rewards points. The bonus arrives together with your regular cash back — usually quarterly, though timing depends on when Rakuten processes payments.
Why Can They Afford This?
Rakuten has ad agreements with their retail partners and earns a small commission whenever you shop through them. Part of that commission gets passed to you as cash back. When you sign up through my referral link, I may receive a member referral bonus too — but it doesn’t change what you get.
FAQ
Can I combine multiple orders to hit $50?
Yes. Your qualifying purchases can be spread across as many orders as you want, as long as they total at least $50 within those 90 days.
What if I spend more than $50?
You still get the flat $50 bonus. The extra amount earns regular cash back based on each store’s current rate — it just doesn’t increase the welcome bonus itself.
Is this offer permanent?
No. Rakuten can modify or cancel it at any time. It was originally set to expire but is still live as of August 2026 for a limited window.
If you carry most of your shopping budget the way I do, every bit of cash back adds up — especially when you’re buying things you were going to buy anyway. Sign up through this Rakuten referral link and grab the bonus while it’s still here.
A note from Ava: I’ve been using Rakuten for a few seasons now, mostly for weekday wardrobe refreshes at Target and Macy’s. The cash back checks arrive like little surprises in the mail — and this $50 bonus feels like finding an extra bill in a winter coat pocket.
There’s something about Jaipur that makes you want to slow down and look up. The pink walls, the women in sweeping skirts of red and orange, the men with their vivid turbans — it all reads like a scene rather than a street. I’ve put together this list of tours, getaways, and places to see because Jaipur is one of those cities where the right experience can change how you feel about an entire trip.
{{image:cover.webp}}
Jaipur was founded by Maharaja Sawai Jai Singh II in 1727 as one of the world’s first planned cities. Today it’s a colourful mix of forts, palaces, bustling markets, and surprisingly hip cafes. It’s called the Pink City because the old city buildings are painted terracotta-pink. The city is also known for its artisans — gemstones, block-print fabrics, leather juttis, blue pottery, hand-embroidered textiles, and more.
Jaipur City Tours
Royal Footsteps
This tour covers Jaipur’s iconic sites and traces the city’s history from medieval times to now. It starts at Amer Fort, a UNESCO-listed medieval fort and palace in the small town of Amer, about 11 km from Jaipur. Amer was the original settlement before the Pink City was built in the early 18th century.
Afterwards, you return to the city for the magnificent City Palace — where the Jaipur royal family still lives today. The tour includes Jantar Mantar, an 18th-century observatory with massive astronomical instruments and the world’s largest stone sundial. It was built by Maharaja Sawai Jai Singh II and is a UNESCO World Heritage site. You’ll also see Hawa Mahal, the Palace of Winds, built in 1799 so the women of the court could watch street festivals unseen.
Duration: Half Day or Full Day
Tour Leader: Local licensed guide
Mountains and Monuments
Jaipur is surrounded on three sides by the Aravalli mountain range, one of the oldest geographic formations on earth. This tour heads out to Kishan Bagh Sand Dune Park, Galtaji (the Monkey Temple), and Sisodia Rani ki Bagh. You can add a visit to Jhalana Leopard Safari Park.
Duration: Half Day or Full Day
Tour Leader: Local licensed guide
Crafts, Shopping, and Artisans Tour
Jaipur is a shopper’s paradise. The markets burst with locally made textiles, block-print fabrics, gemstones, hand-knotted rugs, leather shoes, lac bangles, and so much more. This tour takes you to some of the best stores, workshops, and showrooms in Jaipur. It’s designed to be interactive — you’ll learn about the arts, how things are made, and the culture behind them.
Duration: Half Day or Full Day (or multiple days)
Tour Leader: Local guide
Workshops: Hands-On Crafts
Block Printing Workshop at Qala Creatives
Block printing is one of the crafts Jaipur is known for, and Qala Creatives teaches you how to do it. Qala means art in Hindi. This small woman-owned company preserves age-old techniques while empowering individuals to bring their creative visions to life. Owner Rajshree offers educational tours and workshops in central Jaipur. A session includes a hands-on introduction to block printing, stories of Rajasthan’s craft heritage, and the chance to create and take home your own printed piece.
Workshop Leader: Rajshree or Qala Creatives team member
Rajasthan Studio bridges expert local artisans with travel and art lovers. They offer curated art events led by an art maestro. You can attend a hands-on workshop — Dry Flower Art, Tie and Dye (Leheriya), Rajasthani Miniature Painting, Meenakari Jewellery Making, or others — learn about the craft, and leave with a finished product.
At about 6 am, as the city awakens, your guide meets you for an exhilarating dawn tour by bicycle or e-rickshaw. It blends culture, heritage, architecture, religion, cuisine, and daily life. You’ll experience the morning air and the aromas of the vegetable and flower markets, pickle street, and traditional snacks. Your taste buds get a chance at local specialties, and you’ll hear music and prayers at Govind Dev Ji temple on the City Palace grounds.
Award-winning Heritage Water Walks were created by Neeraj, who combines his passions for water and storytelling to showcase Rajasthan’s cultural heritage. Rajasthan is a desert state, but Neeraj calls it a water civilization. On this two-hour tour, you discover how water drives Rajasthani culture, art, and traditions. You’ll explore ancient water structures — channels, aqueducts, stepwells, and storage reservoirs — and learn about their purpose and history. It’s a relaxed walk through natural surroundings with stories from an ancient desert culture.
Long before Jaipur rose to glory, there was Amer — the ancient capital of Dhoondhar, ruled by Kachwaha Rajput rulers and nestled in the Aravalli hills. The Amer Heritage Walk by Jaipur Retold invites you to step beyond the famous Amer Fort into historic Amer, a living medieval town that continues to be inhabited.
You’ll discover 14th–16th-century temples, ornate havelis, centuries-old step wells, and hidden courtyards. The Rajput rulers commanded campaigns stretching from Afghanistan’s passes to Bengal’s plains. This walk is storytelling on foot among locals who are living custodians of traditions passed down through generations.
If you’re adventurous, climb to a scenic viewpoint for sunrise. See the fort from an angle most visitors miss and watch the walls snake up the hillside. Sagar Lake, where the Aravallis mirror themselves in still water, is one of Amer’s best-kept secrets.
Sair means to explore in Hindi, and Shristi means universe. Shristi is a local storyteller who creates personal experiences that show Jaipur from a female perspective. She says she can be controversial at times, but the guests who choose her tour are receptive and positive about it.
It’s hard to believe, but there is a leopard safari park right on the outskirts of Jaipur. The entrance is in a neighbourhood, but once you drive around the Aravalli hills, you find a thriving forest and leopard sanctuary. The reserve covers 20 square kilometers with immense flora and fauna. When I went, I saw leopards in three different places — about five leopards total, plus many beautiful birds and other mammals.
Duration: 2.5 hours, either morning or late afternoon
If you have a few extra days, these destinations are all reachable from Jaipur:
Ranthambore National Park (approx. 160 km / 3.5 hours)
Located near Sawai Madhopur, Ranthambore has rich biodiversity and is one of the top tiger reserves in India for jeep safaris. It’s a paradise for nature lovers, bird watchers, and history enthusiasts. Sawai Madhopur was founded in 1763 by Maharaja Sawai Madho Singh. The Kachwaha Rajputs hunted tigers there until India became independent. In 1973 the forest was named a tiger reserve, and it became a national park in 1980. Ranthambore Fort inside the park is a UNESCO World Heritage Site.
Recommended duration: Two-three days
Pushkar (approx. 145 km / 3 hours)
A small town surrounded by desert, Pushkar draws pilgrims, hippies, and anyone who likes a relaxed small-town vibe. A sacred lake lined with ghats and temples sits at the centre. Watching worshippers on the steps at dawn as the sun rises over the water is one of those quiet moments that stays with you.
Recommended duration: Two-three days
Sariska Tiger Reserve (approx. 130 km / 2.5 hours)
Sariska is a 1,200 square kilometre tiger reserve set in the Aravalli Hills northeast of Jaipur. The landscape — sharp ridges, deep narrow valleys, plateaus, and grasslands — is covered in dry deciduous forest. It’s home to tigers, leopards, striped hyenas, jungle cats, golden jackals, sambar deer, chital (spotted deer), nilgai, wild boars, the rare four-horned antelope, a massive peacock population, and over 200 bird species.
Recommended duration: Two-three days
Shekhawati (approx. 115 km / 2.5 hours)
The Shekhawati region, north of Jaipur, is famous for historic towns like Mandawa and Nawalgarh — home to elaborately painted havelis, intricate stepwells, and forts built by wealthy merchants.
Recommended duration: Two-three days
A Note from Ava
Jaipur is one of those cities that rewards curiosity. The pink walls are just the cover story — the real magic is in the workshops, the morning markets, and the places most tourists don’t make it to. If you can spare even one extra day for a nearby getaway, do it.
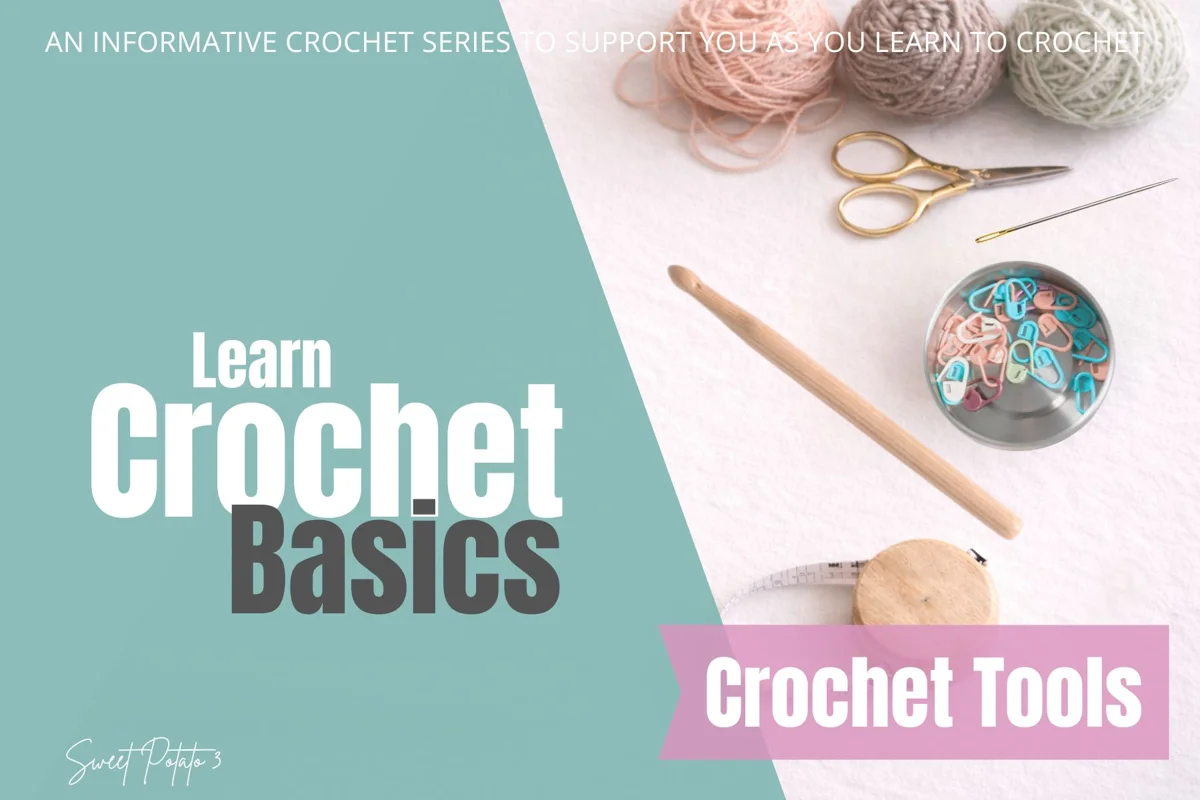
Before you even learn the basic stitches or figure out how to read a pattern, you need to gather the right tools. Don’t panic if your search turns up a list a mile long. Some of those tools are essential; most are just nice to have.
This guide covers the main crochet tools that will actually help you get started. At the end, there’s a shopping list with links to affordable picks and a few splurge-worthy favorites.
{{image:cover.webp}}
Crochet Hooks
The most important tool in crochet is the hook — no surprise there. They come in metal, plastic or resin, and wood or bamboo. Metal ones are smooth and easy to work with. Plastic hooks are lightweight and often fun colors. Wooden or bamboo hooks feel warm in your hand and give you a bit more grip.
There is no best material. Comfort matters most. If you’re just learning and already have a hook, use it. As you gain confidence, try different ones and see what feels right.
If you are shopping for the first time: plastic, metal, and aluminum hooks are the cheapest options. Next up are hooks with added hand grips. After that come handmade resin hooks (price goes up) and wooden ones.
{{image:image-01.webp}}
Hook Sizes
Hooks come in many sizes, and each pattern recommends a specific one. You might eventually develop preferences, but one or two hooks is plenty to begin with. A hook size refers to the thickness of the shaft — the difference between a small hook on the far right and a large one on the left can be dramatic.
{{image:image-02.webp}}
I highly recommend buying a set when you first order. It gives you a variety of sizes to experiment with, and it does not cost much more than a couple of individual hooks.
Stitch Markers
These small tools mark specific stitches or rows as you go along. Some patterns call for them so you can reference certain areas later. I recommend having some kind of stitch marker when you’re learning — they help you track the beginning and end of rows, and flag important stitches.
They come in handy for:
Marking the start of a round
Keeping track of pattern repeats
Highlighting key stitches
You can buy them or improvise with safety pins, paper clips, or scraps of yarn. I have tons of beautiful stitch markers and still grab a plain safety pin most of the time. They all do the same job.
{{image:image-03.webp}}
Tapestry or Yarn Needles
These are used to weave in yarn ends, sew pieces together, and finish projects neatly. The key features: a large eye that fits thick yarn, and a blunt tip so it does not split fibers.
You’ll notice some tapestry needles have a bend at one end. I prefer straight ones, but either works fine. Just keep the shaft style in mind when ordering.
{{image:image-04.webp}}
Scissors
A good pair of scissors is small but important. They do not need to be fancy — sharp blades and a clean cut are what matter.
I prefer dedicated craft scissors because they stay in my project bag and my family does not borrow them for paper cutting. My husband especially, who would otherwise go through them.
{{image:image-05.webp}}
Measuring Tape
You’ll need some kind of measuring tool as you learn to crochet. A flexible tape is ideal eventually, but I used a simple wooden ruler for a long time — it works just fine.
A measuring tape helps with checking gauge, tracking pattern progress, and making sure your project is the right size.
{{image:image-06.webp}}
Project Bags or Totes
Not essential, but genuinely useful. A project bag keeps yarn clean and tangle-free, and lets you grab a work-in-progress and take it anywhere. If you have little ones around, being able to stash your crochet away quickly is worth more than you’d think.
{{image:image-07.webp}}
Tools You Can Skip While Learning
It’s easy to feel like you need everything — but you really do not. I have been crocheting for over 30 years and still don’t own many of the specialty tools out there. Some splurges are fun, yes, but make sure you know what is actually useful for your goals before shopping.
As a beginner, skip:
Multiple hook collections (one set is enough at first)
Yarn bowls, blocking boards and pins, pom makers
Sock shapers, row counters, yarn winders, swifts
Gadgets you don’t yet understand
Your needs will become clearer as you gain experience. These also make great gifts for crocheters who are developing their skills.
A Gentle Reminder
Crochet tools should support your creativity, not complicate it. Start with the basics, add what you need along the way, and focus on enjoying the process.
The most important tools you bring to crochet are patience and practice.
Shopping List
I’ve put together a quick shopping list with affordable and splurge options for every budget. Click on any item to jump straight to it.
Crochet Hook Sets
Metal Hook Set (most affordable — these are what I learned on)
Wooden Set (mid-range)
Comfort Grip Hook Set (splurge — the ones I use and love)
Stitch Markers
Safety Pins (most affordable — you probably have some at home already)
Plastic Stitch Markers
Bead Stitch Markers
All three options are priced similarly.
Tapestry or Yarn Needles
Yarn Needles, straight (my preference)
Tapestry Needles with a bent end
Both are priced about the same.
Scissors
Large Handle Craft Scissors
Scissors with Cap
Metal Scissors (what I use)
Priced similarly — pick the style you like.
Measuring Tape
Basic Sewing Measuring Tape (affordable — really all you need)
Retractable Measuring Tape (affordable — my recommendation)
If you already own a wooden ruler, no need to buy one. But if you are purchasing new, go for the flexible tape.
Project Bag & Tote
Basic Tote with side pockets and cinch (affordable)
Mollie Ollie Tote (mid-price — my favorite, shown in these photos)
Round Zipper Tote (mid-price — great for traveling)
Other Items to Consider
Zipper Hook Case that stores most of your tools
Notebook or Journal for taking notes
Up next: Learning the Language of Crochet — understanding US vs UK terms, hook sizes, and yarn weights.
A note from Ava: Keep it simple, build as you go, and enjoy discovering what works best for you. The right tools help — but your hands do the real work.
Last spring I was standing in my kitchen, staring at a grocery receipt for $187 on a Tuesday. Not even a big shop — just milk, eggs, bread, and somehow three bags of chips plus a rotisserie chicken I definitely didn’t plan.
It hit me: rising food prices are real, but a lot of what I was paying extra for had nothing to do with inflation. Just habits. Quiet little shopping decisions that added up without anyone noticing.
The USDA says the average American family wastes about $1,500 worth of food each year. That’s not even counting impulse buys at checkout or buying something on sale and never touching it.
Here are ten grocery shopping mistakes I’ve caught myself making — and still sometimes do — that cost families real money every single year.
1. Walking in without a list
I used to tell myself I’d remember what we needed. You know how that goes. The list ends up being milk, three snacks my kid decided he wanted at the cereal aisle, and absolutely nothing for dinner on Thursday.
A grocery list keeps you focused. It sounds basic, but having one written down before you get in your car prevents wandering — and wandering costs money. Pair it with a rough meal plan for the week and you’ll spend less and throw away less at the same time.
2. Skipping unit prices
The big box isn’t always the deal. I learned this the hard way with paper towels — bought the family pack because it looked like a steal, then realized the store brand in the smaller size was cheaper per sheet.
Unit pricing lets you compare cost per ounce or per item across brands and sizes. A few seconds of checking can save real money over time. It’s one of those tiny habits that compounds.
3. Shopping on an empty stomach
This is the one I hear about most and still fall for. When you’re hungry, everything looks edible. The snack cakes call your name. That pre-made salad suddenly seems like a great idea instead of a $9 mistake.
Eat something before you go. Even a banana in the parking lot helps you stick to what’s on the list instead of whatever is shiny and salty at eye level.
4. Running to the store too often
“Just a quick trip” for eggs turns into twenty-five dollars because you saw avocados on sale and remembered you needed dish soap and decided we deserved fancy cheese.
Each extra trip means more impulse opportunities. Try to batch your grocery runs — once or twice a week instead of four times. You’ll save on gas too.
5. Paying for convenience without noticing
Pre-cut fruit, individually wrapped snacks, ready-to-heat meals — they’re lifesavers during busy weeks. But convenience has a price tag, literally.
A whole watermelon costs less than a bag of pre-cut melon balls. Washing and chopping your own veggies takes ten minutes more but saves dollars every time. Find the balance that works for your schedule without bleeding your budget.
6. Letting food go bad in the back of the fridge
This is where those $1,500 in annual household food waste numbers come from. Greens wilting in a drawer. Leftovers you cooked once and forgot about. That jar of sauce expiring next month that you’ll definitely miss.
Check what you have before shopping. Plan meals around the ingredients closest to their sell-by date. It sounds obvious until you’re standing there with a cart full of new cilantro while old cilantro rots at home.
7. Sticking to one brand out of habit
I have favorite brands for everything — peanut butter, laundry detergent, the good olive oil. But loyalty without comparison is just paying extra automatically.
Store brands and generics often match name-brand quality at a lower price. I switched to Aldi’s version of my favorite cereal a while back and couldn’t tell the difference. Try one or two alternatives at a time instead of overhauling your whole cart overnight.
8. Buying things just because they’re on sale
A sale only saves you money if you were going to buy it anyway AND you’ll actually use it. That third bottle of ranch dressing is not a savings — it’s a future landfill item.
Before tossing the BOGO deal into your cart, ask yourself: does this fit my meal plan? Will I eat it before it goes bad? If the answer is “maybe,” leave it on the shelf.
9. Not checking pantry and freezer first
I bought canned tomatoes last week because we needed them for soup — only to find four cans already in the cupboard that I’d forgotten about. Happens more than you’d think.
Families who budget well call this “shopping your pantry first.” Look inside before making your list. Build meals around what you own, then buy only what’s missing. It prevents duplicates and stretches every dollar further.
10. Buying bulk when you don’t actually need bulk
Bulk buying works great for things you use regularly — rice, pasta, the snacks your kids eat daily. But it falls apart when food spoils before you get through it or sits in a drawer for eight months.
If it expires faster than you consume it, bulk is just expensive storage. Stick to larger quantities for shelf-stable staples and everyday essentials. Everything else? Buy what fits your actual usage.
Quick checklist before your next trip
I keep this simple list on my phone now. It’s helped me cut our weekly grocery spend by roughly twenty percent over the past few months:
Eat something before heading out
Check pantry and freezer first, then make your list
Scan unit prices, not just sale signs
Say “maybe” means “no” for unplanned items
Pick one store brand to try each trip
Frequently asked questions
How much can fixing these mistakes actually save?
It depends on your starting point, but most families I’ve talked to see anywhere from $30 to $80 less per week after adjusting just a few habits. Over a year that’s roughly $1,500 to $4,000 — which adds up fast.
Is meal planning worth the effort?
Absolutely. Even a rough plan of three dinners for the week cuts impulse buys significantly. You don’t need recipes or spreadsheets — just knowing what’s for Tuesday keeps you from buying five things in the frozen aisle that you won’t use.
What about online grocery shopping?
Online ordering can actually help with some of these mistakes. You stick more closely to your list because there’s no eye-level temptation, and you can check unit prices from the couch. The tradeoff is delivery fees and less flexibility on substitutions.
a note from Ava: I’m not perfect at any of this. Last week I still bought a muffin in the checkout line while holding a full cart. But catching yourself matters more than getting it right every time. Small habits, repeated — that’s where the real savings live.
I used to buy whatever I needed whenever I needed it. Then I started noticing patterns — certain things always seemed to go on sale at predictable times, while other stuff stayed stubbornly full-price no matter how hard you looked.
June is one of those months with a rhythm of its own. Father’s Day promotions push deals on grills and tools. Stores are clearing spring inventory to make room for summer. Produce markets are loaded. But there are plenty of things that don’t go anywhere in price this month, no matter how much you hope they will.
I’ve built a simple list from years of watching these cycles. Here’s what I buy in June, and what I wait on.
Why Some Things Are Cheaper in June
Retailers plan sales around holidays, changing seasons, and inventory pressure. June sits at a sweet spot — Father’s Day drives promotions, outdoor living is at peak demand, and stores want to move seasonal stock before July arrives.
You won’t find great deals on everything. But knowing what tends to go on sale helps you avoid the mistake of paying full price for something that drops two weeks later.
15 Things Worth Buying in June
1. Patio Furniture
June is one of the better windows for patio furniture, especially during Father’s Day and early-summer sales events. Many stores discount outdoor dining sets, lounge chairs, umbrellas, fire pits, and outdoor décor.
If you’ve been eyeing a refresh for your backyard space, compare prices throughout the month — clearance markdowns tend to show up toward the end of June when retailers push harder to clear spring inventory.
2. Grills and Grilling Accessories
Father’s Day sales bring some of the strongest grill deals you’ll see all summer. Gas grills, charcoal grills, smokers, tool sets, and outdoor cooking accessories are commonly discounted.
If your current grill is struggling, June is a good time to replace it before peak cookout season hits. And honestly, an instant-read meat thermometer is one of those small tools that makes a real difference — fewer overcooked steaks, less food waste overall.
3. Power Tools
Home improvement stores run Father’s Day promotions on power tools, tool sets, air compressors, ladders, and workshop equipment. Even if you don’t need a big purchase, it’s a solid time to grab smaller tools you’ve been putting off.
A basic toolkit at home means fewer service calls for small repairs — and that saves money faster than you’d expect.
4. Summer Produce
Buying produce in season is one of my favorite ways to keep grocery costs down. June brings lower prices on:
Watermelon
Strawberries
Blueberries
Cherries
Cucumbers
Zucchini
Corn on the cob
Peaches (depending on your region)
Stock up when prices dip and freeze extras for smoothies, baking, or meals later in the month.
5. Freezer-Friendly Meats
Grilling season drives sales on hamburgers, hot dogs, chicken, pork, and other cookout staples. If you have freezer space, stock up while prices are lower.
A vacuum sealer pays for itself quickly — it extends freezer life noticeably and cuts down on food waste, which is its own kind of savings.
6. Lawn and Garden Supplies
Garden centers discount hoses, planters, mulch, fertilizers, and gardening tools throughout June. It’s a practical time to finish outdoor projects before the hottest part of summer arrives.
7. Camping Gear
Outdoor retailers promote tents, sleeping bags, camp stoves, lanterns, and hiking equipment during June. If you have a summer camping trip on the calendar, compare deals now rather than waiting until July when prices creep back up.
8. Swimsuits
Many retailers offer swimsuit promotions before peak vacation season. Shopping in June gives you better selection and pricing than waiting until mid-summer — which is also when the good sizes disappear.
9. Mattresses
Father’s Day sales frequently include mattress discounts, and many major brands run promotional pricing throughout June. If you’ve been considering an upgrade, this month is worth checking.
10. Appliances
Select kitchen and laundry appliances go on sale during summer promotions. Watch for package deals and rebates — those stack nicely when the base price is already down.
11. Fans
Before the heat settles in, stores discount box fans, tower fans, and oscillating fans. It’s one of those purchases where timing matters more than you’d think.
12. Outdoor Games and Toys
Sidewalk chalk, water toys, sports equipment, and backyard games are commonly promoted during June sales events.
13. Reusable Water Bottles
Hydration products show up in summer promotions, and switching from bottled drinks to a decent reusable bottle is a small change that saves money every single month after that.
14. Father’s Day Gifts
From clothing to outdoor gear, June is full of Father’s Day sales. Even if you’re shopping for yourself, these promotions often extend beyond gift-specific items.
15. Warehouse Club Memberships
Summer promotions sometimes include discounted memberships, gift cards, or bonus incentives for new members at warehouse clubs.
10 Things to Hold Off On Until Later
Knowing what not to buy is just as valuable. Here are the items I skip in June:
1. School Supplies
Back-to-school sales usually start in July and hit their lowest prices in late July and August. No rush.
2. New Electronics
Prime Day, Black Friday, and holiday events almost always offer better discounts than anything June brings for electronics.
3. Fall Clothing
New seasonal arrivals sell at full price right out of the gate. Wait until late summer clearance starts.
4. Christmas Gifts
Holiday shopping deals are still months away. Unless you genuinely need something now, wait.
5. Holiday Decorations
Seasonal décor stays at regular pricing through June — both holiday and spring items.
6. Winter Clothing
Selection is limited in June, and deeper discounts arrive later in the year when stores clear winter stock.
7. Snow Blowers
Better deals show up during winter clearance events — nobody’s trying to sell snow equipment in midsummer at a discount.
8. Tax Software
Tax season promotions are long gone by June. These products hit their lowest prices right after the filing deadline, usually around April.
9. Holiday Baking Supplies
Discounts on holiday baking items come much closer to the actual holidays — not in the middle of summer.
10. New Car Models
Dealerships tend to offer stronger incentives later in the year as newer inventory arrives and end-of-quarter pressure kicks in.
Frequently Asked Questions
What are the best things to buy in June?
Patio furniture, grills, power tools, summer produce, camping gear, and freezer-friendly meats tend to offer the strongest deals this month.Are there major sales events in June?
Yes. Father’s Day promotions, summer outdoor living sales, and seasonal grocery deals run throughout the month. Some warehouse clubs also offer membership incentives.What should I avoid buying in June?School supplies, electronics, holiday decorations, winter equipment, and fall clothing are usually better purchases later in the year when dedicated sales hit.
June gives you plenty of room to save if you know what’s actually on sale — and just as importantly, what isn’t. Before heading out, take a minute to check your shopping list against these seasonal patterns. The goal isn’t perfection; it’s avoiding the obvious traps where full price is the default.
Small savings compound over time. Buy strategically in June, wait patiently on the rest, and you’ll keep more money where it belongs — in your pocket.
A note from Ava: I started keeping a seasonal shopping calendar three years ago, stuck it on my fridge, and haven’t gone back. It’s not glamorous, but knowing that fall clothes won’t go on sale until August has saved me more than once.
Last Tuesday I stared at my bank balance and had the same thought you probably have at least once a month: where did all this money go?
I wasn’t shopping. No big purchases, no impulse coats from Target (okay, one). But still — the number felt thinner than it should.
The culprit isn’t usually one dramatic expense. It’s a hundred tiny ones that slip through unnoticed. The coffee you grab between errands. That food delivery fee on a rainy Thursday. A streaming subscription you last used in February.
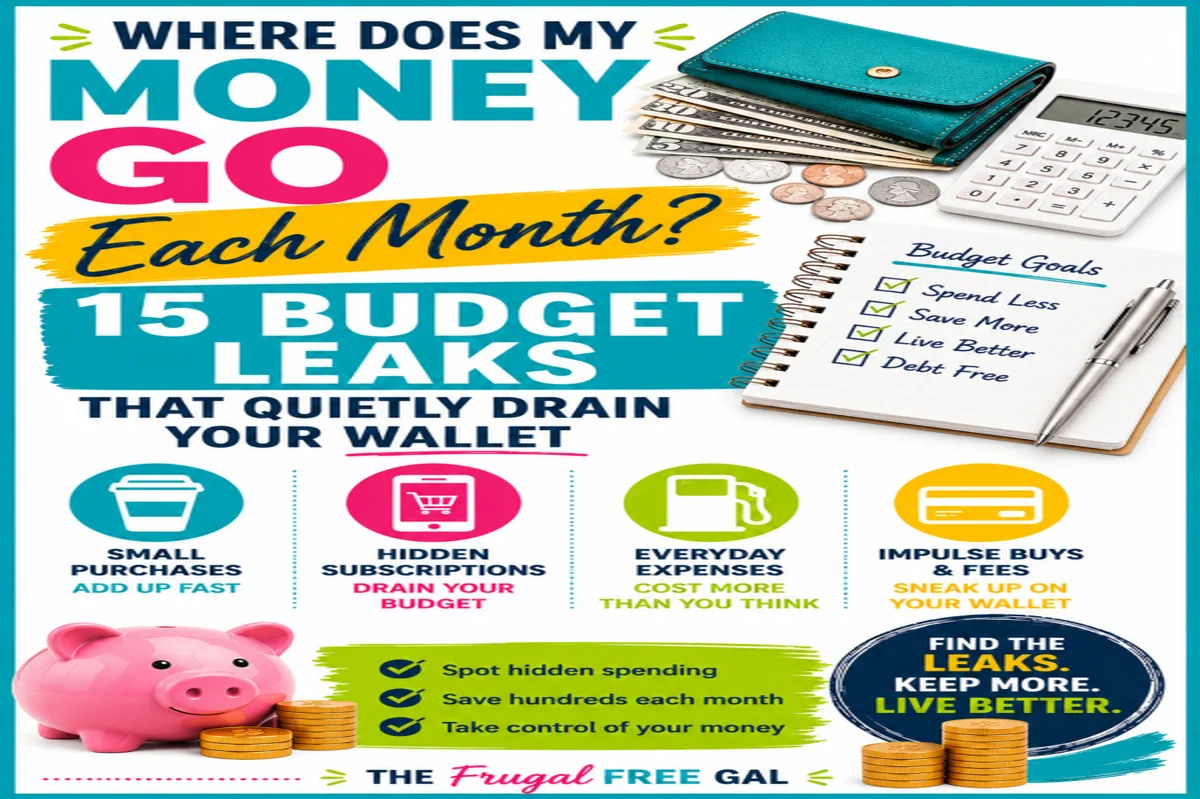
These budget leaks are real, and together they can cost you thousands each year. Let me walk you through the 15 I’ve caught myself — and how to stop them before they add up.
1. Food Delivery Fees
I love an order-in night as much as anyone. But between delivery fees, service charges, tips, and inflated menu prices, a $25 restaurant meal can easily become $40 when it arrives at your door.
What I do instead: Pick up orders when I can. And on genuinely busy nights? A few quick freezer meals saved from my last proper cooking session keep me from defaulting to the delivery app.
2. Convenience Store Purchases
A drink and a snack at the corner store feels harmless in the moment. But $10 three times a week? That’s more than $1,500 a year — enough for an entire capsule wardrobe of basics.
What I do instead: Pack a snack and a reusable bottle before I walk out the door. Five minutes of prep saves me serious cash over time.
3. Forgotten Subscriptions
This one hit close to home. I was paying for a fitness app I hadn’t opened since March, a music service I use maybe twice a month, and a cloud storage plan that had upgraded itself without my say-so.
The usual suspects:
Streaming services
Music subscriptions
Gaming memberships
Fitness apps
Cloud storage plans
What I do instead: Once a month — right when my paycheck lands — I scan my bank statement and cancel anything I didn’t use that week. If it’s worth keeping, I’ll notice.
4. Daily Coffee Runs
$6 a day doesn’t sound like much until you multiply it by 350 working days. That’s over $2,000 — roughly £1,600 or €1,850 — every single year.
What I do instead: A good travel mug and a solid morning brew at home. I still treat myself on Fridays; the rest of the week, my coffee maker does the heavy lifting.
5. Extra Grocery Store Trips
The ‘just one thing’ run is one of the most expensive phrases in the English language. You go in for milk and leave with a snack aisle’s worth of regret.
What I do instead: A weekly shopping list, written before I’m hungry, posted on the fridge. If it’s not on the list, it doesn’t come home. Most weeks, that single rule saves me more than I expect.
6. Buy Now, Pay Later Purchases
Splitting a purchase into four installments makes spending feel manageable. The problem? Those installments stack up alongside your rent and groceries, and suddenly you’re paying for three things simultaneously without realizing it.
What I do instead: Treat BNPL like any other debt — not free money. Use it sparingly, track the payment dates, and skip it entirely if I can’t afford to pay upfront.
7. Impulse Amazon Purchases
The ‘Add to Cart’ button is designed to be clicked without thinking. Those small items — a phone grip, socks on sale, a kitchen gadget I’ll use once — feel trivial until you see the monthly total.
What I do instead: The 24-hour rule. If it’s not essential, I wait one full day before ordering. About half the time, I forget about it entirely.
8. Gas Station Snacks
A candy bar and a soda at the pump cost roughly double what they’d be at the supermarket. It’s a markup you accept because you’re in a hurry — but it adds up fast.
What I do instead: Keep a small stash of snacks and drinks in my car. The front seat snack drawer has saved me more times than I can count.
9. In-App Purchases
Mobile games and apps are masters at nudging you toward small purchases. A few dollars here, a coin pack there — before long it’s a surprisingly large monthly line item.
What I do instead: Set a firm entertainment spending limit each month (I keep mine under $20 / £15 / €18) and stick to it. No exceptions.
10. Name-Brand Loyalty
I used to insist on name brands for everything from laundry detergent to snacks. Then I tried the store versions side by side, and honestly? Most of the time I couldn’t tell the difference.
What I do instead: Compare store brands and generic alternatives before reaching for the familiar label. In the UK or Europe, supermarket own-brands are especially worth trying — they’ve gotten really good in recent years.
11. Unused Memberships
Gym memberships, warehouse clubs, book subscriptions — these bite hardest when you’re paying for access you never use. I know because my gym card from last winter still sits in a drawer somewhere.
What I do instead: Review every membership at least once a year. If I haven’t used it enough to justify the cost, I cancel it without guilt.
12. Bottled Water
A $2 bottle of water here and there seems nothing to worry about. Over months? That’s money for literally free tap water that tastes just fine in a good bottle.
What I do instead: A reusable water bottle always in my bag. It sounds basic, but it works every time.
13. Last-Minute School Expenses
School fundraisers, class parties, spirit days, activity fees — they come fast and often, especially if you have kids. Each one feels reasonable alone; together they’re a quiet drain.
What I do instead: A small sinking fund dedicated to school expenses. Even $20 set aside each month takes the sting out of September surprise charges.
14. Retail Checkout Temptations
Those candy bars, magazines, and travel-sized products stacked near the register aren’t accidental. They’re placed there because they work — and I’ve fallen for them more than once.
What I do instead: Stick to my list and walk straight past the checkout display. If something catches my eye, I leave it. My wallet thanks me later.
15. The "It's Only $20" Mindset
This might be the biggest leak of all. We justify purchases because they're only a small amount — but five $20 items in one week is $100, and that's before we add up the weeks.
Before I buy anything non-essential, I run through four quick questions:
Do I actually need it?
Will I still want it next week?
Is there a cheaper option that does the same thing?
Does this purchase align with what I’m trying to save for right now?
If even one answer is ‘no,’ it stays on the shelf.
How to Find Your Own Budget Leaks
Here’s a simple exercise that changed how I think about spending:
Pull your bank and credit card statements from the past 30 days.
Highlight every purchase under $25 (roughly £20 / €22).
Add them up.
I was shocked the first time I did this. Turns out, most of my spending wasn’t happening in big chunks — it was leaking out in small, forgettable moments throughout each week.
How Much Could These Budget Leaks Be Costing You?
Expense
Weekly Cost
Annual Cost (USD)
Coffee runs
$30
$1,560
Convenience store stops
$20
$1,040
Food delivery fees
$15
$780
Impulse purchases
$25
$1,300
That’s $4,680 per year from just a handful of spending habits. Roughly £3,750 or €4,300 for our readers outside the US.
The Bottom Line
If you’ve ever wondered where your money goes each month, the answer is probably hiding in plain sight — scattered across small purchases that felt harmless at the time.
You don’t need to stop enjoying things. The goal isn’t deprivation; it’s intentionality. When you know exactly what’s leaking and plug even a few of those holes, you free up money for the things that actually matter — whether that’s a sale on something you’ve been eyeing or just breathing room in your budget.
What are budget leaks?
Budget leaks are small recurring expenses that slowly drain your finances without providing much long-term value. They’re easy to overlook because individually, each one seems trivial.
Why do small purchases add up so quickly?
Because they happen frequently. A $5 coffee or a $3 snack feels insignificant in the moment, but repeated daily or weekly, those amounts compound into hundreds — sometimes thousands — of dollars over months.
How do I figure out where my money is going?
Review your bank statements and credit card transactions from the last month. Look for recurring small purchases, subscription payments, and any pattern of spending under $25 that you can’t quite remember making.
Should I stop spending money on fun things?
Absolutely not. The point is to spend intentionally — cut the expenses that don’t bring real value, and keep room for the things you genuinely enjoy. Budgeting should make life easier, not more stressful.
A note from Ava: I started tracking my small purchases last month because I was tired of wondering where my paycheck went by the 20th. The habit took two weeks to stick, but now it feels less like work and more like knowing myself better. Try it for just one month — you’ll be surprised what shows up.
Thank you to Kohl’s for sponsoring this post. All opinions are my own.
I stood in front of my closet last week trying to figure out what to wear on a Friday where half the town is wearing red, white, and blue — but nobody wants to look like they’re in a parade float. Sound familiar?
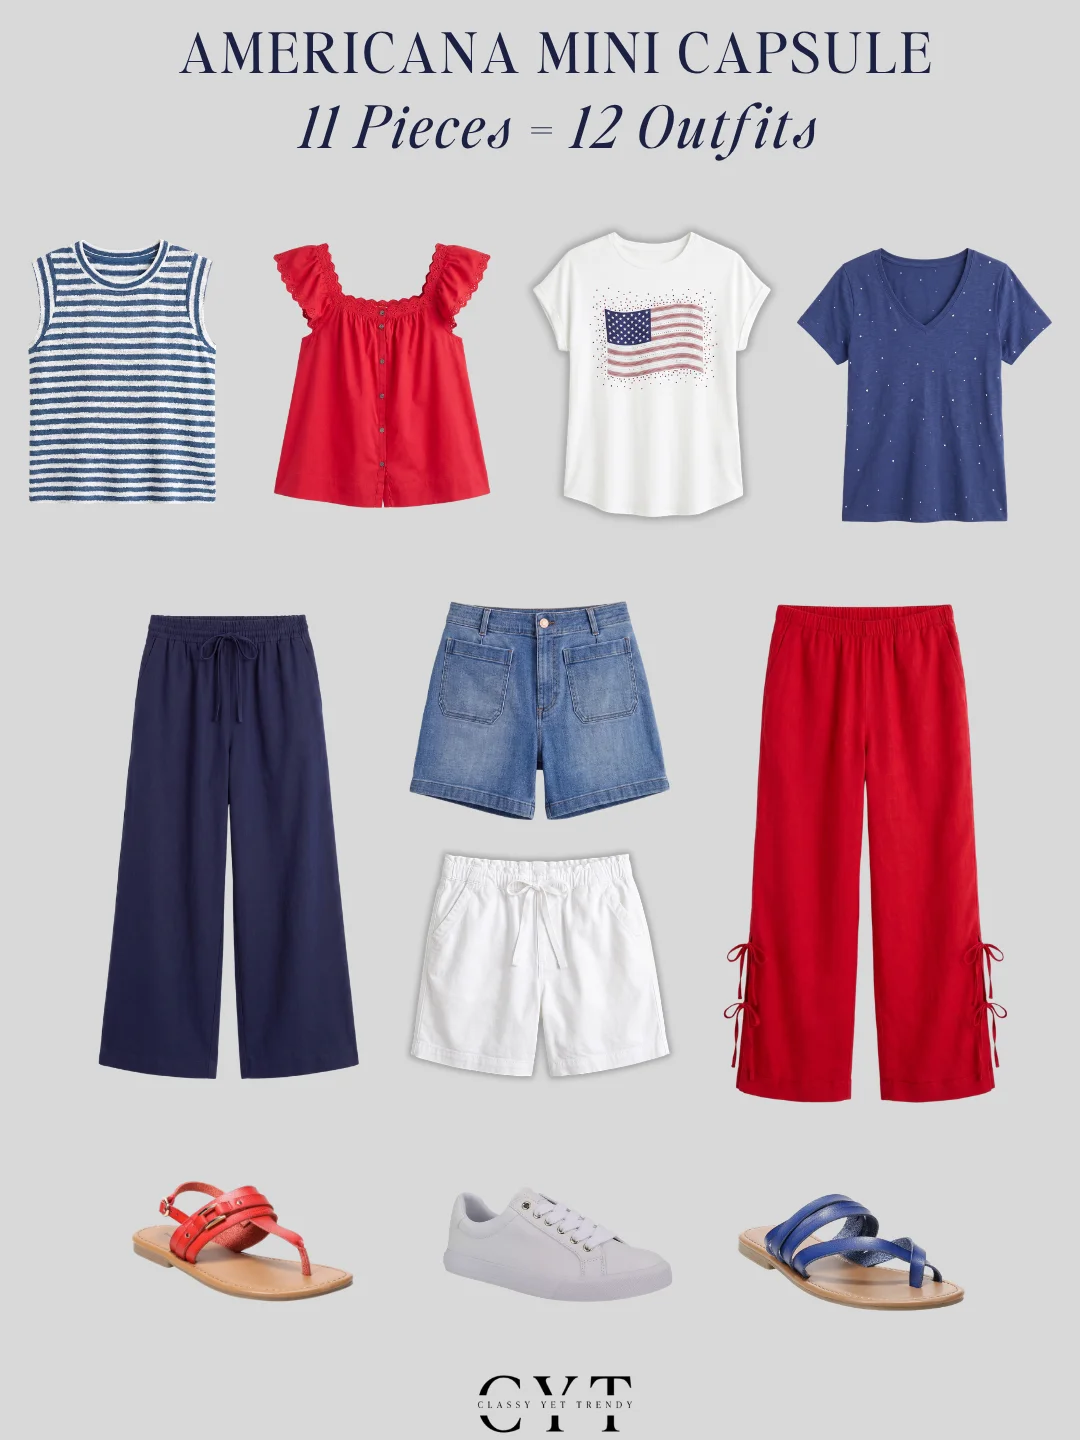
Here’s the thing: you don’t need twelve separate outfits for the Fourth of July weekend. You need eleven pieces that mix well.
This year marks America’s 250th birthday (yes, that’s the whole Semiquincentennial — I’m showing my age), and there are more parties, parades, and backyard barbecues than ever. I built a mini capsule in navy, red, and white. Everything is from Kohl’s because they carry brands like LC Lauren Conrad, Sonoma Goods For Life, Simply Vera Vera Wang, Croft & Barrow, Nine West, and Lee — all at prices that don’t make me flinch.
What I love about this capsule: the outfits work for July 4th, but nothing gets retired after fireworks. Swap in a different top or pair of pants from your regular wardrobe and you’ve got weekday looks through August. Pack it in a carry-on and it’s a travel capsule too.
The Pieces
Here’s what goes into the eleven-piece capsule:
Clothes and Shoes
A navy dress that works dressed up or down
A white button-down — linen-blend, no ironing drama
A red top (sleeveless for the heat)
Navy shorts with a flat front and room to breathe
White denim shorts that actually stay white
A striped tee in navy and white — reads as intentional, not casual by accident
An oversized blazer in navy or khaki for cooler evenings
Sneakers (white) and sandals (neutral) to switch the whole vibe
Accessories
A red crossbody bag that holds phone, keys, sunscreen
Simple gold jewelry — small hoops, a thin chain
A straw hat or baseball cap depending on the event
Sunglasses because it’s July
The blazer does most of the heavy lifting. Threw it on over a tee and shorts and suddenly you’re meeting someone for dinner instead of just grabbing ice cream.
12 Outfit Combinations
I mixed these eleven pieces into twelve looks. Here’s how they break down:
Outfit 1: The navy dress with white sneakers and a straw hat. This is my go-to for any daytime event — you show up looking put together without trying.
Outfit 2: White button-down tied at the waist over navy shorts, with sandals. The shirt adds structure; everything else is comfort.
Outfit 3: Red top, white denim shorts, and the crossbody bag. Straightforward patriotic look that doesn’t feel costume-y because the pieces are clean lines, not graphic tees.
Outfit 4: Striped tee with navy shorts and sneakers. The outfit you throw on when you’re running errands before heading to a party — it transitions without a full change.
Outfit 5: Navy dress layered under the blazer with sandals. Same dress as Outfit 1, just evening-ready now.
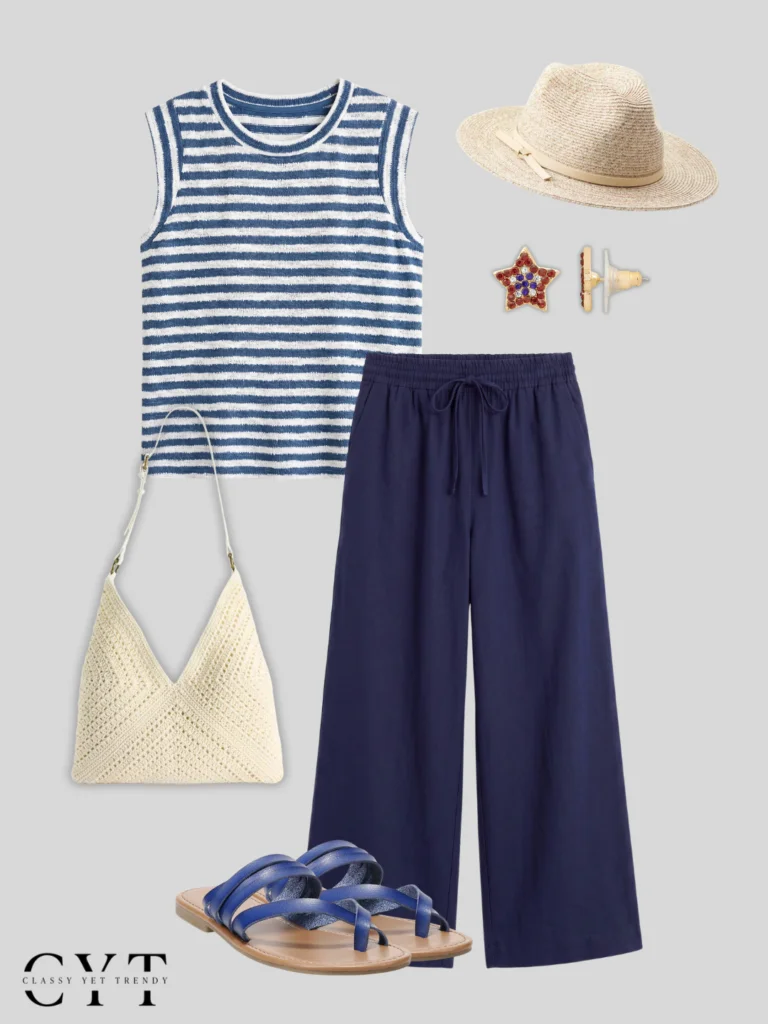
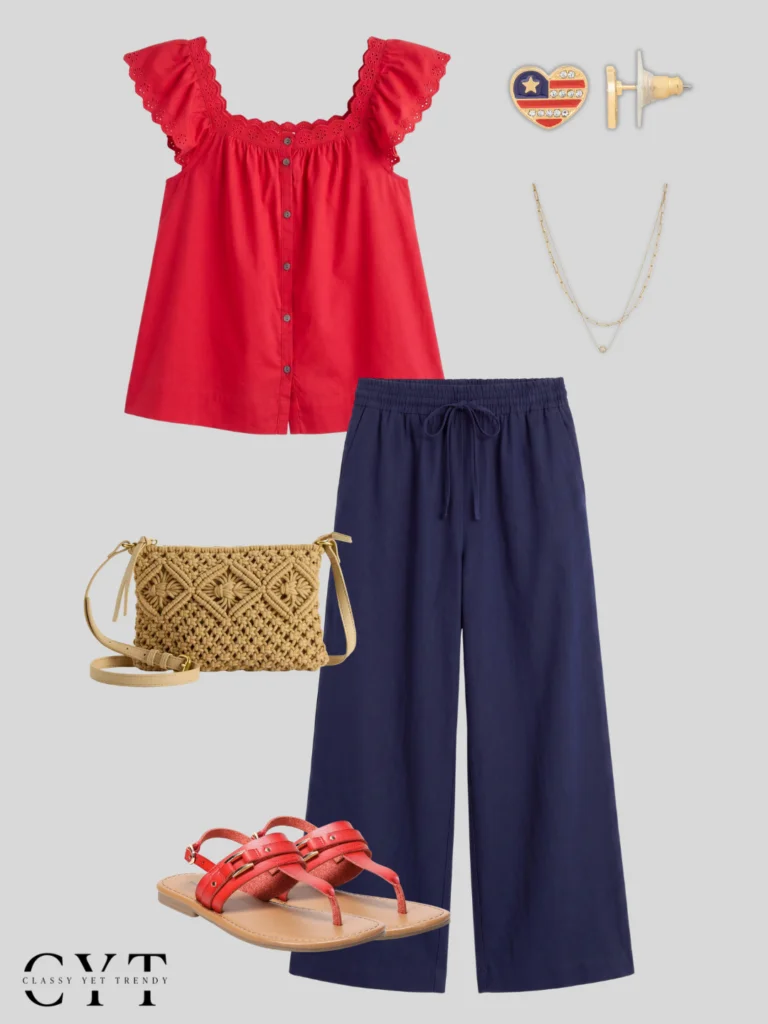
And seven more combos I styled: white tee + red skirt + sneakers; striped tee + white shorts + blazer + sunglasses; red top + navy pants + sandals; button-down untucked + denim shorts + crossbody; navy dress + sandals (no hat) for a simpler daytime look; blazer over the red top with white shorts; and the full casual set — striped tee, white shorts, sneakers, sunglasses.
Which one would you wear first?
A Few Tips
Mix proportions: pair fitted tops with relaxed bottoms. The capsule works because nothing is all tight or all oversized at once.
Use the blazer as a switch: it turns three casual looks into evening-ready outfits without adding a new piece.
Keep accessories simple: gold jewelry against navy and red reads polished. Overly ornate pieces compete with the color palette.
FAQ
Can I expand this capsule beyond 11 pieces?
Absolutely. Add a black top and navy pants, or swap in different colored shorts from your closet. The framework stays the same — neutrals plus one accent color that you rotate.
Will these outfits work for travel?
Yes. Eleven pieces fit easily into a carry-on. I’d roll the tees, fold the blazer on top, and pack shoes in a bag at the bottom. You get twelve looks from one suitcase.
I don’t wear red — can this capsule work for me?
Swap red for any color that pairs with navy and white: olive, mustard, or even black. The structure is the same; only the accent changes.
A note from Ava: I made this capsule while reorganizing my closet on a Tuesday morning. Halfway through, I realized I already owned six of these pieces — just never put them together. Sometimes the best outfits are hiding in your own drawers.
I love how matte lipstick looks. What I cannot stand is what it does to my lips.
Every fall, same routine: reach for that deep brown or burgundy shade, feel my bottom lip start pulling within two hours, and suddenly I’m picking at flakes in the middle of a meeting. It’s not glamorous.
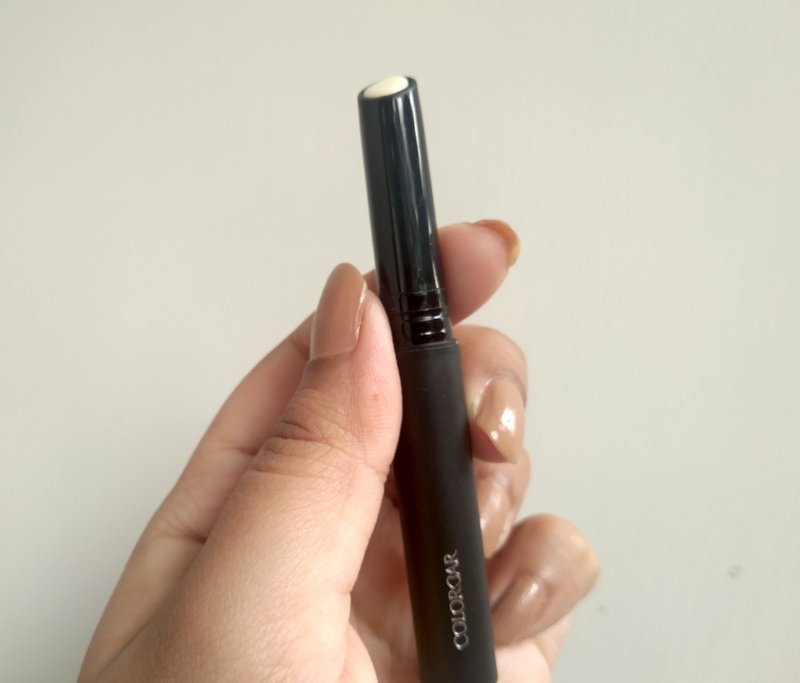
So when someone recommended Colorbar Lip Prime & Care to me — a 2-in-1 lip primer and balm from an Indian beauty brand that ships globally via Amazon — I figured it was worth a shot. If anything, worst case, it becomes another lip balm in my bag.
About the Product
Colorbar is an Indian beauty brand (think Sephora-level quality at drugstore prices), and this particular formula was developed in Italy. It’s cruelty-free, dermatologically tested, and free from paraffin, parabens, and preservatives.
The idea behind it: smooth your lip texture before color goes on, like a face primer but for your mouth. The pigment-binding formula is supposed to make lipstick last longer without the cracking and drying that usually comes with matte finishes. You can also just use it as an everyday balm — vitamins E and C in there act as antioxidants.
That’s a small tube. I’ll be honest about the quantity later because it is one of my main gripes with this product.
The ingredient list leans silicone-heavy: cyclopentasiloxane, octyldodecyl stearoyl stearate, silica, plus tocopherol (vitamin E) and ascorbyl palmitate (vitamin C). Nothing alarming if you’re familiar with primer formulas — it reads like a face primer translated for your lips.
How I Used It
I tested it twice daily for about two weeks. Morning: apply the primer, wait 60 seconds, then go over with whatever matte lipstick was on my desk that day. Evening: used it alone as a balm after removing makeup.
Here’s what happened.
Packaging and First Impressions
It comes in a silver reflective box — not over-the-top, just clean. Inside is a black retractable tube that looks like a slim lipstick. Lightweight, travel-friendly, cap shuts tight. I’ve dropped mine into my tote twice already with no issues.
The product looks stark white in the tube but goes on completely clear. There’s a faint chemical scent when you first twist it up, but nothing that lingers once applied.
Two Weeks In: The Honest Timeline
Day one: It glides on smoothly and feels moisturizing right away. I waited about a minute before applying lipstick — my lip lines looked slightly filled in, though the deeper creases near the corners didn’t budge much. Subtle effect, not magic.
Days two through five: This is where I started noticing real differences. My matte lipsticks — especially drier formulas like MAC’s Retro Matte line — applied without any tugging or pulling. No more that feeling of dragging a dry crayon across your lips.
The wear time improved too. Normally my lipstick fades noticeably by lunch if I’m drinking coffee throughout the morning. With this underneath, it stayed put until at least mid-afternoon. Obviously, eat anything oily and nothing in this world saves your lip color — that’s just physics.
Days six through fourteen: No flakiness. No cracking. My lips didn’t feel dry even when wearing lipstick for eight hours straight. I also started using it on its own as a balm during the day, which worked fine if your lips aren’t severely dry.
One thing to note: this primer doesn’t do much if you have dead skin sitting on top of your lips. Exfoliate first or you’re just sealing in the roughness.
The Good
Makes matte lipstick application noticeably smoother — no tugging
Extends lip color wear time by a solid two to three hours
Prevents lips from cracking or drying under color
Subtly fills in fine lip lines (not deep ones, but helps)
Doubles as an everyday balm when you’re not wearing lipstick
Packaging is lightweight and travel-friendly
Cruelty-free, paraben-free, formulated in Italy
The Not-So-Good
2.5 grams for roughly $11 / £8.50 — the quantity is small and the tube will disappear faster than you’d like
Doesn’t replace a good exfoliator; useless over dead skin
If your lips aren’t normally dry, this isn’t a necessity — just another step in your routine
Budget Alternative
If the price-per-gram is giving you pause, NYX Butter Gloss Balm ($6) and Maybelline Baby Lips ($4) are cheaper options that work fine as standalone balms. Neither functions as a true primer though — they won’t extend your lipstick’s wear time the way this one does.
Verdict
Ava’s score: 4.8 out of 5 stars.
Despite the tiny quantity, I think Colorbar Lip Prime & Care earns its price tag if matte lipsticks are your thing and cracked lips are your problem. It is not a must-have for everyone — but if your lips always rebel against matte color, this product genuinely helps.
FAQ
Can I use Colorbar Lip Prime & Care without wearing lipstick?
Yes. It works fine as a daily lip balm. If you already have a balm you’re happy with and your lips aren’t super dry, though, this won’t replace it.
Does it work with glossy or sheer lipsticks too?
The review focused on matte formulas where the difference is most noticeable. It works with creamy and glossy finishes as well — extends wear time slightly, though the smoothing effect matters less since glosses don’t pull on your lips like mattes do.
Is Colorbar available outside India?
Colorbar is primarily an Indian brand with physical stores there. Outside India, you can find their products on Amazon (US and UK) through third-party sellers. Prices may vary slightly by region.
A Note From Ava
I keep this in my work bag now, right next to the lip liner I use for touch-ups. It’s small enough that it doesn’t take up space, and on days when I’m rushing between meetings and need my lipstick to hold together, it feels like a tiny piece of armor.
There is a version of me that thought self-care meant buying a candle and pretending that counted. Then came the desk job — eight hours, five days a week, staring at a screen — and my body started sending bills.
I’m talking stiff shoulders, zero patience, the whole thing.
Friends in LA kept telling me about this massage studio called The Now. I finally went, mostly because my neck was threatening to stage a coup. And honestly? It hit that sweet spot I didn’t know existed. Not a hole-in-the-wall, not stuffy luxury — just good service at a price that doesn’t make you wince.
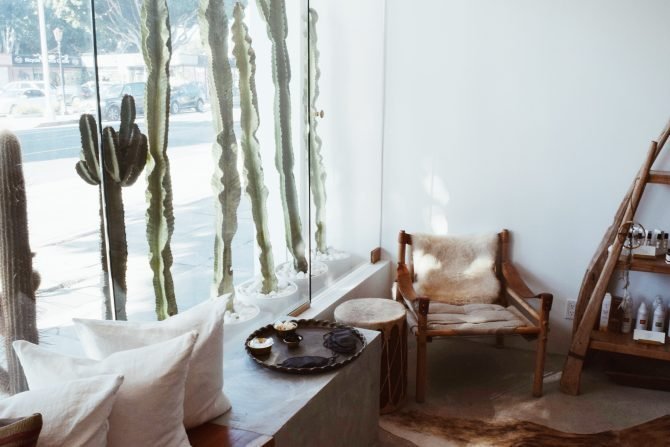
The space is gorgeous inside. Think woven pendant lights, neutral tones, sheepskin throws everywhere. Very Instagrammable, but in the “this actually looks like the photos” way, not the “staged for content” way.
I get their signature “The Now” massage — 25 minutes — and I’ve been back several times. Each session feels different, which is nice. But the thing that keeps pulling me back? The ambient ocean wave sounds. I know that’s not technically part of the massage, but I have never heard anything more calming put through speakers.
They’re in West Hollywood, Santa Monica, and Silver Lake (hearing Studio City is next). If you’re in LA, book a walk-in or reserve online — easy to take a friend too.
When the spa isn’t an option
Most of you reading this aren’t near Los Angeles. I get it. So here’s what I do at home when I need to decompress and my wallet says “stay put.” All of these brands ship widely — Dr. Teal’s, Kiehl’s, and L’Occitane are available in the US, UK, and EU.
Dr. Teal’s Epsom Salt Bath (Lavender)
Lavender is my go-to, always. This is the drugstore find I keep restocking. Smells great, actually relaxing — not one of those that just perfumes the bathroom.
L’Occitane Exfoliating Butter
I’ve already finished one jar and had to reorder immediately. Makes your skin feel impossibly smooth. Worth the price jump from drugstore salts if you can catch it on sale.
Kiehl’s Lavender Bubble Bath
Yes, more lavender — but this time in bubble bath form with sea salts and aloe. It is genuinely the best bubble bath I’ve tried. On a rough day, this alone fixes things.
Herbivore Botanicals Bath Salt — “Calm”
I’m already a fan of their brand (the Phoenix facial oil is another story entirely), and this has been on my wish list for months. The product literally calls itself “Calm.” You can’t argue with that confidence.
FIG+YARROW Pink Bath Salts
Haven’t tried these yet — Kristin has raved about them so much that I had to include them. Next on my list. Will report back when I actually buy a tub instead of just talking about it.
A few honest notes
The Now massage runs roughly $40–50 for 25 minutes — solid value if you’re in the area.
Dr. Teal’s salts are under $15 a bag. The budget pick, hands down.
L’Occitane butter sits around $30. Worth hunting for sales.
Kiehl’s bubble bath is roughly $20 — not cheap, but I go through it fast enough that it earns its spot.
FAQ
Is The Now only in LA?
Right now they have locations in West Hollywood, Santa Monica, Silver Lake, and a new one opening in Studio City. All Southern California.
Can I get these bath products outside the US?
Dr. Teal’s, Kiehl’s, L’Occitane, and Herbivore Botanicals all ship internationally or have EU/UK stockists. FIG+YARROW is a smaller Canadian brand — check their site for your region.
What’s the cheapest way to unwind at home?
A bag of Dr. Teal’s Epsom salts and 20 minutes in a warm bath. Under $15 total. I do this at least once a week when life gets loud.
A note from Ava: I used to treat self-care like something I’d get around to. Now I schedule my baths the same way I schedule meetings — because if I don’t, they never happen. How do you unwind? Tell me your go-to in the comments.
I was standing in an airport security line last month, juggling my passport, a laptop bag, and a water bottle I’d definitely forgotten to empty. The woman ahead of me was trying to untie her hiking boots with one hand while holding her boarding pass in the other. I felt that familiar pang of empathy — and then slipped mine off without breaking stride.
That’s what travel clothing is supposed to do: get out of your way. Not look like a fashion editorial, not demand attention. Just work.
I’ve been traveling full time for 20 years now, since my first around-the-world trip back in 2006. Thousands of flights later — from sweltering Southeast Asia to the freezing approach into Reykjavik — I know what travel clothing actually needs to do. It’s about function, comfort, and durability. Everything else is bonus.
So what makes a piece great for the road? And how do you pack it without hauling your entire closet?
Comfortable, Yes. Pajamas, No
I’ve noticed something annoying lately: people treating long-haul flights like they’re heading to bed instead of across the world. Full flannel pajama sets, fleece onesies — I get it. Flights are exhausting.
But there’s a middle ground between restrictive clothing and looking like you just left your bedroom. Modern travel pants — merino joggers or technical stretch trousers — feel like sleepwear but still look put-together when you walk off the plane. The goal is simple: dress comfortably enough to rest, presentable enough that if your luggage gets lost, you could still grab a coffee without changing.
What Makes Great Travel Clothing
Six things I look for in every piece:
Pockets. Zippered ones are non-negotiable.
I’m genuinely that excited about pockets. Side pockets — one zippered, one not — plus hidden compartments for your passport or phone. Security and convenience go hand-in-hand.
In 20 years of full-time travel, I’ve never used a money belt once. They just add bulk to your middle, and who wants that? Plus I rarely carry cash anymore anyway.
My favorite trick: Royal Robbins dresses and pants with cleverly hidden compartments. Perfect for city wandering or border crossings where you need quick access but don’t want everything on display.
Wrinkle-resistant fabrics
Ironing is not on my travel itinerary — I don’t even own an iron at home. Clothes that can be balled up in a backpack and still come out looking decent? That’s the standard.
Royal Robbins’ Spotless collection has been my go-to for this. The materials somehow bounce back smooth without any hotel steam wand involved.
Stretch
You never know when you’ll sprint to catch a train or scale an unexpected staircase in some centuries-old European hotel. Stretchy fabrics make the difference between comfort and misery — especially on long-haul flights, bus rides, and train trips.
I always wear stretchy travel pants with pockets whenever I’m sitting for hours. Non-stretch fabrics dig into your waist, tighten around your knees, or feel restrictive as your body naturally shifts during travel. Stretch adapts to you.
Breathable and temperature-regulating
If you’ve ever worn jeans in Vietnam, you already know this one. Natural fibers like merino wool, alpaca, bamboo, hemp, and organic cotton regulate temperature and wick moisture better than synthetics.
Smartwool is my pick for base layers and tees — they keep you cool when it’s hot and warm when it’s chilly, with minimal odor buildup.
Slip-on shoes
Slip-on shoes remove friction in travel — literally and figuratively. They simplify airport security and make daily transitions easier, which matters more than you’d think until you’re juggling all that stuff.
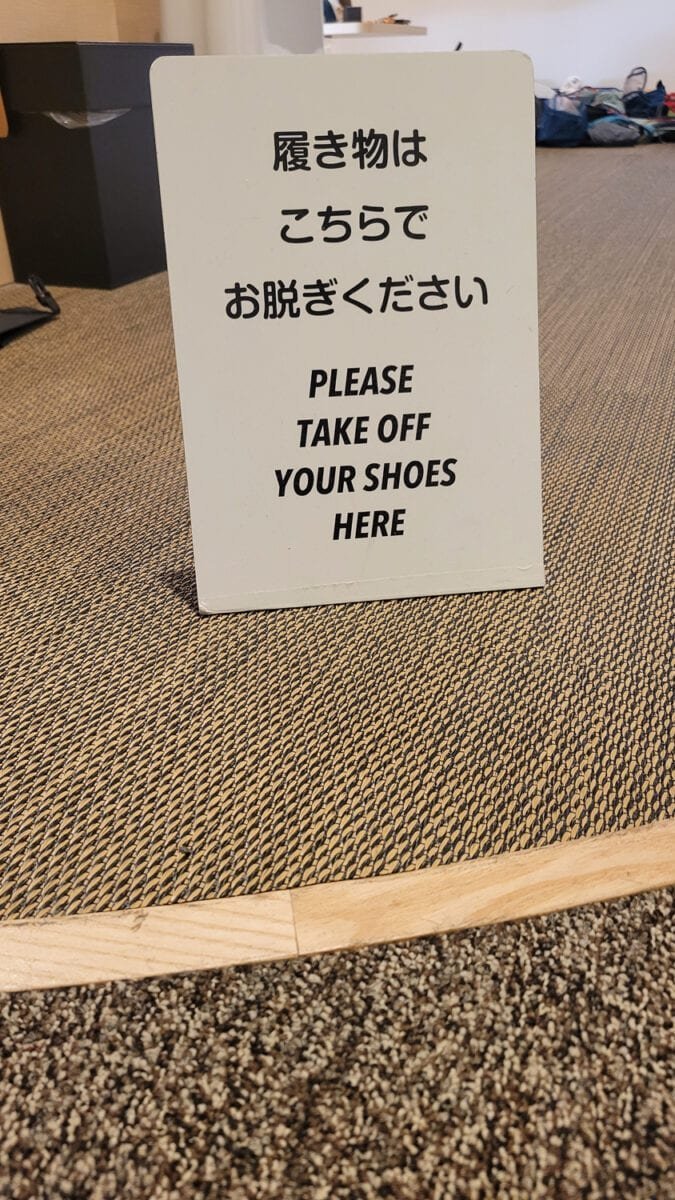
They’re also essential for Japan and parts of Southeast Asia where you’ll be expected to remove your shoes regularly. Slip-ons make the process seamless without the awkward balancing act of untying laces multiple times a day. Kizik makes slip-on tennis shoes with patented heel technology, so they’re dead simple to slide on and off.
Versatility
Nothing gets me more excited than something that does double duty — like reversible leggings, or a scarf/pashmina that works as a blanket on the plane, a shawl at dinner, and a beach cover-up by afternoon. Every dual-purpose item reduces what you need to pack.
Compression Socks (Don’t Skip Them)
I never board a flight or train without compression socks. After experiencing a blood clot years ago following a long flight, they became non-negotiable for me.
Beyond the medical benefit, they help with swelling and fatigue — especially on those marathon travel days. And they’re not just for sitting: I use them for hiking and biking too. They reduce muscle fatigue and speed recovery.
My go-to brand is VIM & VIGR. They make compression legwear that actually looks good — unique patterns, seasonal drops — so you feel like a traveler, not a patient.
How to Pack It All: Capsule Wardrobe Basics
The real magic isn’t in the pieces themselves — it’s how you pack them. A capsule wardrobe is just a curated set of mix-and-match clothing that works for any destination. Here’s my system:
Stick to 2–3 base colors, plus 1–2 accents
Black, navy, gray as your foundation. Then add one or two accent colors through scarves and jewelry. These small items are lightweight, take up almost no space, and instantly dress up a neutral outfit.
Layer light, not heavy
Dump the sweaters. A merino tank plus a long-sleeve layer plus a compressible down jacket covers most climates. That down jacket can also double as a pillow on the plane.
Limit yourself to three pairs of shoes
I know this one’s hard, but here it is: one for walking (sneakers or supportive sandals), one for hiking or adventure (trail shoes or boots), and one nicer pair (flats or low-profile sneakers) for dinners. Sometimes your supportive sandals can double as the nicer pair.
I often use trail running shoes that handle both walking and hiking — two jobs, one pair.
Packing tips that actually work
Use packing cubes or compression bags. They turn your suitcase into a portable dresser instead of a black hole. I organize by category — shirts in one cube, pants in another, underwear and socks in their own. No more exploding your entire suitcase on the hotel bed to find one t-shirt. My favorite is the Thule Compression Cube Set (around $47) because it combines organization with compression in one.
Roll your clothes. I’ve been doing this since 2006. Rolling works hand-in-hand with packing cubes — it makes clothes more compact, reduces wrinkles, and lets you see each item instead of stacking things on top of each other and forgetting what’s in the bottom.
Wear your bulkiest clothes on the plane. Hiking boots are heavy and bulky. I wear them for the flight so they don’t eat up suitcase space. Doesn’t always work perfectly — you can’t wear boots 24/7 — but every ounce saved counts when you’re carry-on only.
Don’t forget a hat (or two, or three). They resolve bad hair days after a long flight and the inevitable wait until hotel check-in at 4 PM. Great sun protection for sightseeing and outdoor activities. And they can instantly dress up an outfit in a capsule wardrobe. I normally take 2 or 3 hats per trip.
Wallaroo makes great quality packable sunhats — their entire line folds down small enough to stash anywhere. To transport wide-brimmed hats, I use a Klipsta clip attached to my carry-on when I’m not wearing them. A carabiner works for baseball caps.
The Fabric Question: Natural vs Synthetic
Fabric is the foundation of great travel clothing. The best options regulate temperature, resist odors, dry quickly, and stay comfortable after repeated wear.
Best natural fabrics:
Merino wool — odor resistant, temperature regulating, breathable
Alpaca wool — warmer than merino for its weight, lightweight, highly insulating
The best travel clothing usually blends natural and synthetic to maximize all three: comfort, durability, and performance.
Brands I Actually Trust
Clothing styles change every year, so rather than listing specific products that’ll be outdated in a season, here are the brands that consistently put out great travel pieces:
Royal Robbins was built specifically around travelers’ needs. The brand was founded by Royal and Liz Robbins — legendary climbers and early adventure travelers who understood what it means to live out of a backpack. Their clothes tick every box: versatile, wrinkle-free, breathable, stretchy, pocket-plentiful, lightweight. And they’re a little dressier than typical adventure travel clothing, which works well for business-casual destinations too.
Smartwool has come far beyond socks. Their full lineup uses merino wool — one of my favorite travel fabrics, period. Temperature regulation, odor resistance, moisture management. You can wear a Smartwool base layer on a flight, hike all day, and wear it again the next day without worrying about smell.
Kühl balances performance and style perfectly. Their FREEFLEX collection is water resistant with stretch that rebounds — maintains its shape even after hours of sitting. The material is incredibly soft, like wearing pajamas on a long-haul flight, but they look smart enough for dinner. I have multiple pairs of their travel pants.
Outdoor Research leans toward outdoor adventure, but most adventure gear has exactly the qualities you want in travel clothes: wicking, stretch, lightweight, quick-dry. Their jackets are my favorite layering pieces — from lightweight puffy vests to heavy-duty parkas that handle wind, rain, and freezing temps.
PAKA uses alpaca wool sourced directly from Peru — warmer than merino for its weight, breathable, naturally odor-resistant. Beyond performance, their commitment to sustainability is impressive: fully recyclable packaging and a traceability program where you can track each garment back to the exact alpaca it came from.
Old Navy — yes, really. For cheap, simple travel basics like tank tops and t-shirts, Old Navy is hard to beat. Sometimes you just need something affordable and functional. I’ve always liked their basics; maybe it’s because I worked at Gap during my corporate career. Who knows.
Why Investing in Quality Travel Clothing Is Worth It
High-quality travel clothing lets you pack less while doing more. Instead of separate outfits for flights, hiking, sightseeing, and dining, you rely on fewer versatile pieces that handle all four.
The benefits add up: lighter packing (carry-on only), greater comfort on long travel days, less frequent laundry, better durability over years of use, and more versatility across climates. Over time, quality actually saves money because you need fewer pieces and replace them less often.
Final Thought: Comfort Over Cute
You want to look good in photos — I get it. But no one looks cute when they’re sweating through polyester or limping from blisters. Invest in the pieces that do the work for you. They should breathe, stretch, resist wrinkles, and make you feel ready to explore… comfortably.
And whatever you do, don’t forget the compression socks.
What is travel clothing?
Travel clothing is apparel designed specifically for comfort, versatility, and functionality on the road. It typically includes wrinkle-resistant fabrics, stretch, breathable materials, odor resistance, and secure pockets — everything that makes long flights, sightseeing, hiking, and carry-on travel easier.
What fabrics are best for travel?
Merino wool, alpaca wool, nylon blends, polyester blends, bamboo, and hemp. These regulate temperature, resist odor, dry quickly, and stay comfortable during long stretches of sitting or walking. The best pieces usually blend natural and synthetic fibers.
How many outfits should you pack?
Most travelers only need 3–5 tops, 2–3 bottoms, 1–2 layering pieces, one versatile dress (optional), and one jacket. A capsule wardrobe approach lets you mix and match those into multiple outfits.
A note from Ava: I used to pack a separate outfit for every scenario — flight clothes, hiking clothes, dinner clothes — until I realized the same stretchy dark pants worked for all three. My suitcase got lighter that day, and my mornings got easier. If you carry most of your weight below the waist, you know the struggle of finding travel pants that don’t pinch after a long flight. The ones with real stretch are worth every dollar.