Author: Ava Laurent

  • Browbone Highlighting: Three Ways to Wear It (And When Each Works Best)

    Browbone Highlighting: Three Ways to Wear It (And When Each Works Best)

    Last week I was getting ready for a brunch date and stopped mid-application, staring at my mirror like it owed me an answer. Should I highlight under my brows or not? Halfway or all the way? Honestly, I’d been doing it on autopilot for years without ever questioning which style suited me best.

    So I sat down with a light pink pencil, three looks, and no filter, and broke it apart. If you’ve ever wondered whether browbone highlighting is worth the extra step in your morning routine, this is for you.

    What Is Browbone Highlighting?

    If you’re not familiar with the term, browbone highlight means applying a light shade to the bone right under your eyebrow. It lifts the eye area and gives that just-glowed-from-within look without any shimmer overload. You can do it three ways:

    • Halfway (partial): only under the outer wing of the brow
    • All the way (full): underneath the entire brow line from start to finish
    • Skip it entirely: clean brows, no highlight

    I want to be upfront: none of these is wrong. They just read differently on your face depending on the occasion and what else you’re wearing.

    What I Used (And Price Ranges)

    I kept it simple with products I already own. Here’s the breakdown:

    Brow pencils. Mechanical ones are my go-to because they don’t need sharpening and survive a throw-in-the-bag morning. I’ve tried options across price tiers: mid-range around $20, budget picks under $10, and splurge versions closer to $30.

    Highlighting pencil. A light pink shade is what you want here — not white, not gold, just a soft pink. I’ve found good options at both the $15 mark and the under-$10 range. The color payoff is similar; the difference is mostly in how smoothly it glides on.

    Extras. For a full eye look to go with it, I pulled out an eyeshadow quad (the Golden Mink shade) for one of the styles — that’s a splurge item around $25-30. You can also grab drugstore alternatives under $8 if you want to experiment without commitment.

    Price key: $ = under $10, $$ = $10-$25, $$$ = $25+

    The Three Looks: Step by Step

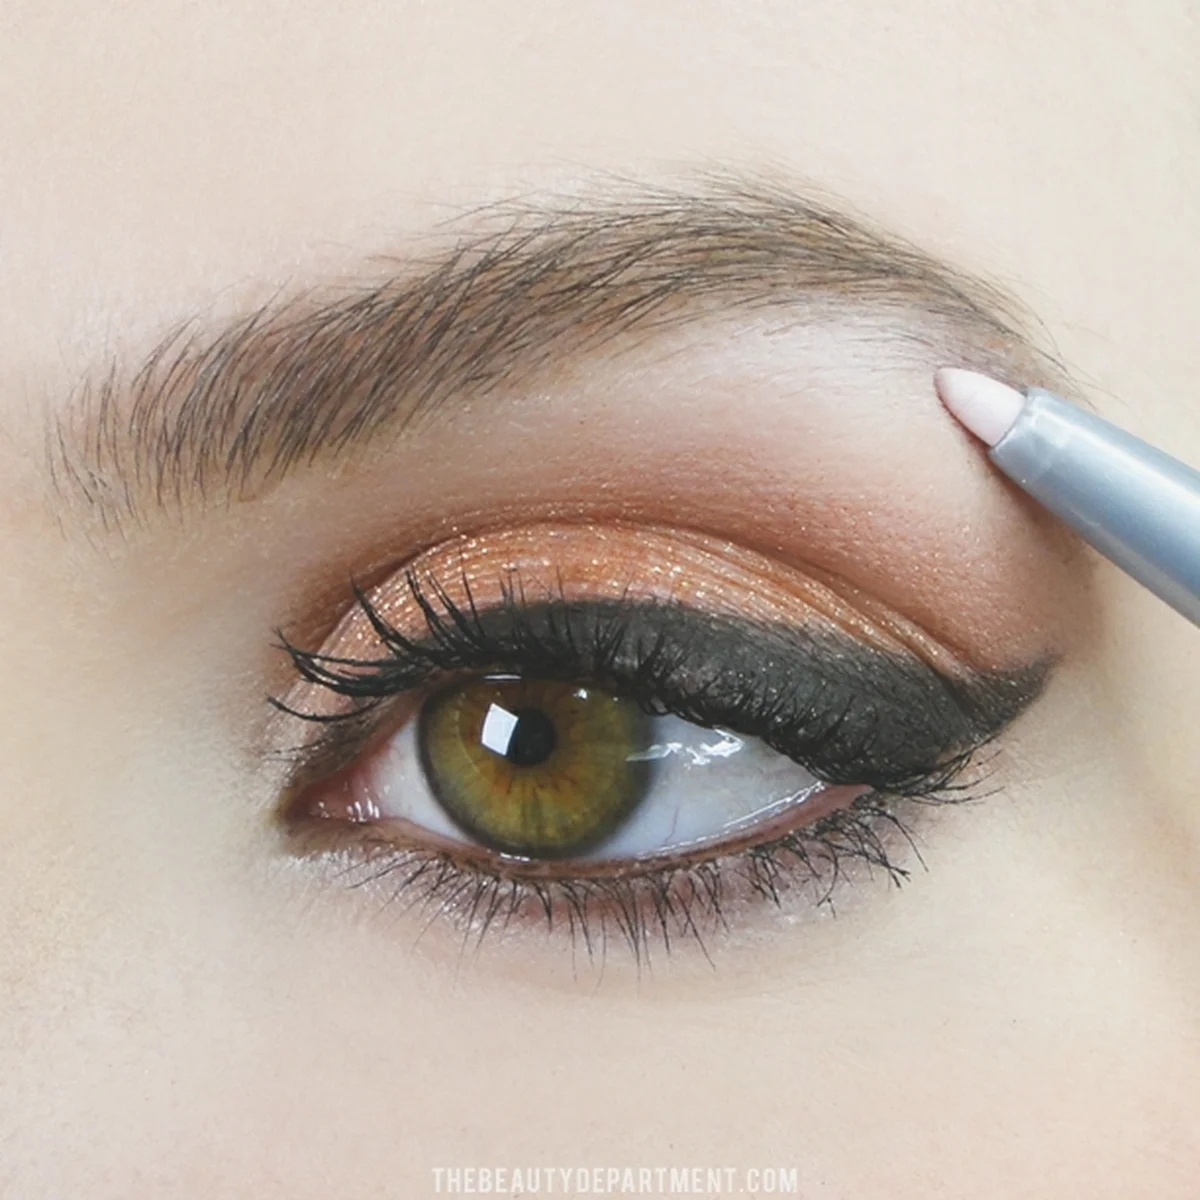
    Browbone Highlighting: Three Ways to Wear It (And When Each Works Best) - photo 1

    All three browbone styles side by side.

    Look 1: Partial Highlight (Just Under the Brow Wing)

    This is my everyday default. Here’s how to do it:

    1. Fill in your brows with a mechanical pencil, keeping strokes light and natural.
    2. Take your light pink highlighting pencil and apply only beneath the outer third of the brow — from about the arch outward.
    3. Smudge gently with a fingertip or small brush so there’s no hard line.

    The effect is subtle. It lifts the eye without calling attention to itself. I wear this version to work, to errands, anywhere I want to look polished but not dressed up for makeup.

    Look 2: Full Highlight (Under the Entire Brow)

    This one makes a statement:

    1. Fill brows as usual.
    2. Run the pink pencil underneath your entire brow line, from inner corner to tail. Go slow — you can always build it up.
    3. Blend with a clean brush or cotton swab until it reads soft and diffused, not like a stripe of chalk.

    Full highlight gives the most lifted effect. It pairs well with evening looks, date nights, or whenever your outfit is minimal and you want your face to carry more visual weight. The trade-off: if you overdo it, it can look harsh. Less product than you think.

    Look 3: No Highlight at All

    Sometimes the best move is to skip it entirely:

    1. Fill brows with pencil or pomade.
    2. Define the lower lash line if you want, but leave the browbone bare.
    3. Add mascara and call it done.

    This is my go-to for hot summer days or gym-meets-lunch situations. Clean brows without highlight read fresh and effortless. If your skin is glowing that day (or you’re wearing a bold lip), skipping the browbone keeps everything from competing for attention.

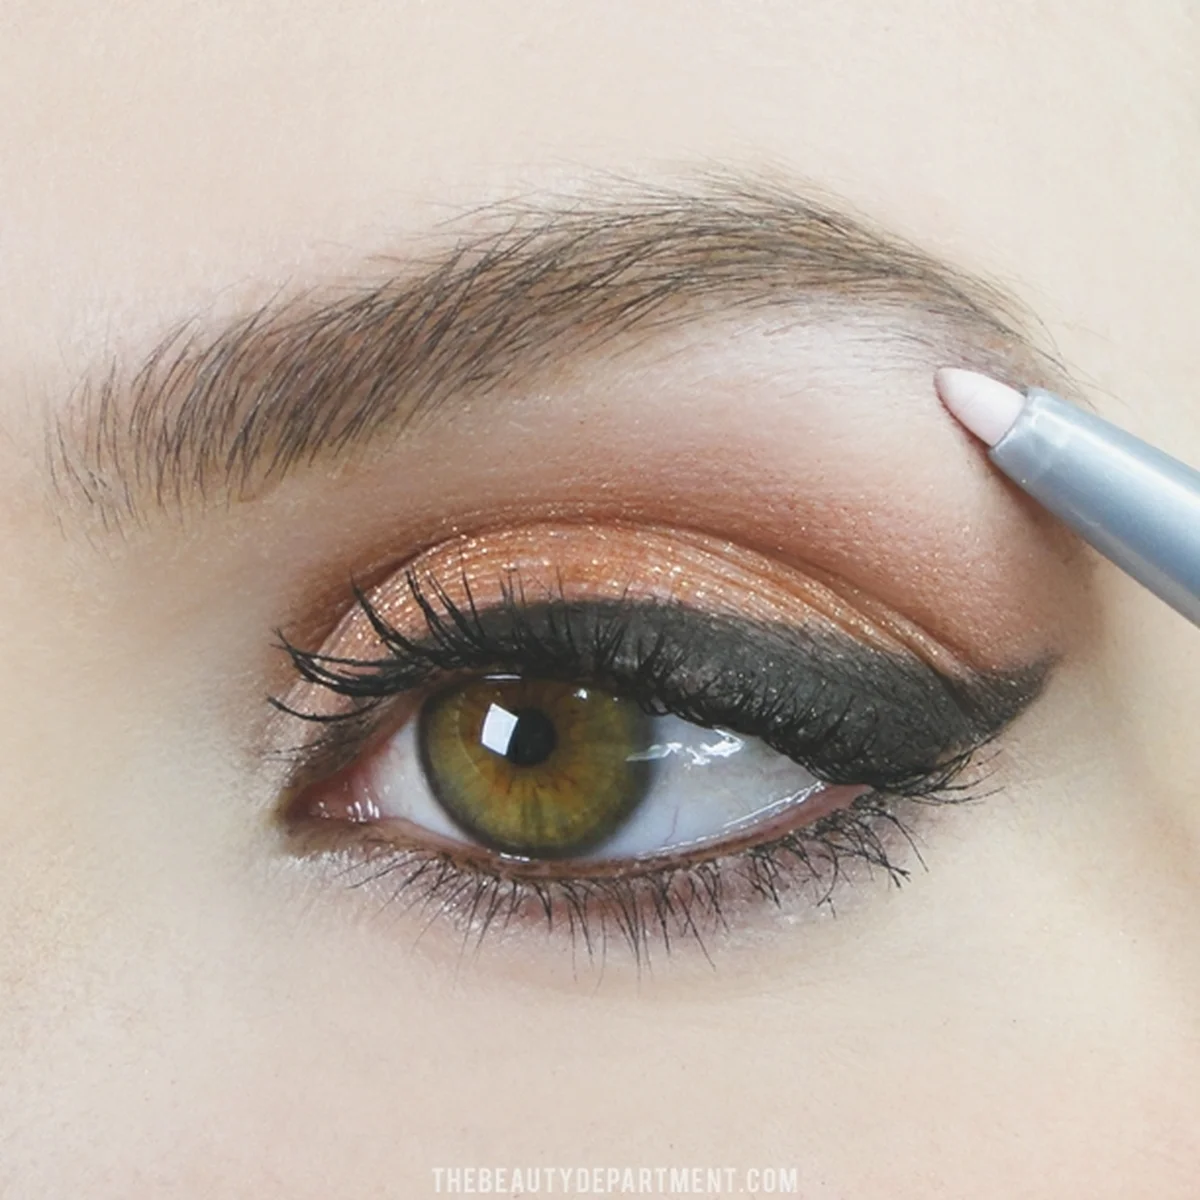
    Browbone Highlighting: Three Ways to Wear It (And When Each Works Best) - photo 2

    The final comparison showing all three styles on one look.

    Quick Tips

    • Pink highlighters read more natural than white on most skin tones. White can turn ashy in certain lighting.
    • If your brows are already thick and dark, lean toward partial or no highlight — full coverage might look heavy.
    • A mechanical pencil is easier to control for browbone work than a cream or powder formula.

    Frequently Asked Questions

    Do I need special products for browbone highlighting?

    No. A light pink lip liner, concealer shade, or even a soft eyeshadow works. You don’t need to buy something labeled specifically as a “brow bone highlighter.” The key is picking the right shade.

    Which style looks most natural for daily wear?

    Partial highlight under the brow wing reads the most effortless for everyday. It gives just enough lift without looking like you sat down with a brush and planned it out. That said, “no highlight” is equally valid on days when your skin or lips are doing the work.

    Can I use shimmer instead of matte pink?

    You can, but I’d keep it minimal. A touch of shimmery champagne under the brow arch works for evening looks. Full-length shimmer highlight tends to read more “going out” than “running errands.” If you want everyday glow, stick with a soft matte or satin finish.

    What I’d Wear Each Style With

    I can’t help myself — I always think about how makeup pairs with clothes. Here’s my take:

    • Partial highlight: works with a neutral capsule outfit — jeans, white tee, blazer. Everything is understated and intentional.
    • Full highlight: pairs with something dressier — a silk camisole, dark trousers, heels. When the outfit is put-together, your face can be too.
    • No highlight: sneakers, denim jacket, messy bun days. Let the clothes or the vibe carry it.

    The browbone might not be a wardrobe piece, but it fits into the same logic as how you dress — match the intensity of your face to the energy of your outfit.


    A note from Ava: I’ll admit my favorite is partial highlight. It’s the outfit equivalent of “I tried, but not too hard.” Still, I genuinely wear all three depending on where I’m headed that day. Which style are you leaning toward?

    Keep reading

  • Cute Outfits: The 22 Pieces I’m Actually Wearing Right Now

    Cute Outfits: The 22 Pieces I’m Actually Wearing Right Now

    I was standing in front of my closet last week, holding a white tank top in one hand and a brown satin midi in the other, and I realized something. The outfits I actually wear on repeat never need more than three good pieces. The cute ones look effortless because the decision was made long before I got dressed.

    So I went through everything I’ve been reaching for over the past few weeks and pulled together the pieces I’m genuinely wearing right now. Twenty-two of them, grouped by category, with a simple formula for putting a cute outfit together in about five minutes. No runway looks, no pieces you’d only wear once.

    Young woman in a casual street-style outfit walking a city street

    This post contains affiliate links. If you buy through them, I may earn a small commission at no extra cost to you. I only include pieces I’ve actually worn and would buy again.

    What makes an outfit cute?

    It’s a put-together look that feels flattering, a little fun, and not overdone. And it’s less about expensive clothes than about combining a few good pieces well. The formula I keep coming back to:

    • One piece leads, everything else stays simple.
    • Balance fitted and loose, and define your waist.
    • Keep the palette to two or three colors.
    • Finish with shoes and a bag that fit the occasion.
    • Add one small detail that’s actually you.

    A one-and-done dress or matching set is the easiest version of all of this. Zero styling math, and you still look like you tried.

    How to put a cute outfit together

    Here’s the exact formula I use, in order.

    1. Start with one hero piece

    Pick the piece you’re excited about. A satin midi, a bold matching set, a statement maxi. Let it lead, then add quiet supporting pieces so it stays the star instead of competing with itself. This is the whole trick. Once you lead with one thing, the rest of the outfit stops being a puzzle.

    2. Use the two-thirds rule

    Balance a fitted piece with a looser one. A snug halter top with a flowy maxi skirt. A relaxed shirt with slim jeans. And define your waist somewhere. Tuck, cinch, or pick pieces that do it for you. It’s the single fastest way to make any combination look intentional, and if you carry most of your weight below the waist, you know how much this one detail changes the whole look.

    3. Keep the color story tight

    Cute outfits look expensive when the palette is small. Two or three colors that work together, repeated throughout. Cream, brown, and army green mix effortlessly, and one pop color like plum or butter yellow keeps it from feeling flat.

    4. Let a set or dress do the work on lazy days

    Some mornings I genuinely don’t want to think. A co-ord set or a one-and-done dress is a full outfit with no decisions left to make. Add shoes and a bag and you’re out the door looking like you tried, because the piece already did.

    5. Finish with shoes and a bag that match the mood

    The shoes decide whether an outfit reads day or night. Braided flats and Mary Janes keep it easy and cute. A strappy heel takes the same pieces out in the evening. Choose the footwear last, once you know where you’re going.

    6. Add one small detail that feels like you

    Gold hoops. A swipe of blush. A claw clip. A signature scent. These little finishing touches cost nothing, but they’re what make an outfit yours instead of generic.

    Once these become second nature, getting dressed takes minutes. Honestly, leading with a hero piece and defining your waist will make almost any combination look intentional.

    The 22 pieces I’m wearing right now

    Every piece below is one I chose for my own closet and would genuinely spend my own money on. They’re grouped so you can jump to what you need.

    Dresses

    A good dress is the fastest cute outfit there is. It’s a whole look in one piece.

    Zaria satin cami midi, green or brown (ASOS, Nobody’s Child). Satin with lace trim and a front slit. The green is my default, flat sandals for day, heels for dinner. The brown is one of the biggest colors for fall, and I love it with gold jewelry and a strappy heel for a low-effort, high-impact look.

    Amaya strapless chiffon maxi, blue polka dot (Meshki). Playful, a little retro. My pick for a warm-night event where you want to look done without trying too hard.

    Provence day dress, husk geo (Monday Swimwear). The throw-on-and-go dress every cute wardrobe needs. Relaxed, breathable, and it works over a swimsuit on vacation or with sandals for errands.

    Soleil knit and mesh halter maxi, cream (Meshki). Quietly one of the sexiest pieces in this edit. The halter neck and subtle mesh read elevated, and cream looks expensive against a tan.

    Tops

    The right top turns jeans or a skirt into a real outfit.

    Anni pinstripe shirt, brown (Princess Polly). Tucked into jeans or a maxi skirt, or worn open over a tank. Easiest way to look pulled-together for fall.

    Rugby polo sweater, cotton cashmere (Quince). The cute-but-cozy piece I reach for as it cools down. Quince quality is unreal for the price, and the collar makes even leggings look intentional.

    Ruby top, plum (With Jean). My go-to for a cute going-out outfit with jeans. The plum is so flattering, and it dresses up instantly with a heel and a bold lip.

    Micro-rib button tee (Quince). The kind of basic that quietly makes every outfit better. Tucks in cleanly, layers under everything, and the little buttons add just enough detail.

    Ribbed tank, cotton cashmere (Quince). Perfect under the pinstripe shirt or the rugby polo, or solo with high-waist jeans.

    Rouleau loop cut-out top, yellow (ASOS Design). A butter-yellow cut-out top is a fun, of-the-moment piece for a night out. The rouleau loop detail feels designer, and yellow is such a happy, unexpected color.

    Adora shirred long-sleeve top (Seven Wonders, Revolve). The transitional piece for in-between temperature days. The gathered detailing is flattering, and it pairs beautifully with the maxi skirts in this edit.

    Estella asymmetrical halter top (Seven Wonders, Revolve). An easy way to make jeans look like a real outfit. Clean and elevated, perfect for date night with a maxi skirt or tailored trousers.

    Off-the-shoulder hardware top (Abercrombie). A flirty pick for warm nights. Shows just enough shoulder and looks amazing with high-waist jeans or a slip skirt.

    Skirts and matching sets

    Skirts and co-ords are my secret weapon for looking put-together fast. The sets have the styling already done for you.

    Makena gathered midi skirt, green (Meshki). A versatile cute-outfit builder. Pair it with the ribbed tank for day or the halter top for night. It works from now well into fall.

    Shimmer Haze mesh 2-piece set (Urban Outfitters). A matching set is the ultimate cheat code. This shimmery printed mesh set is a fun festival-meets-going-out moment.

    Heartloom Violet set, army green (Revolve). A chic, grown-up two-piece. Wear it together for an instant outfit, or split the pieces to stretch your wardrobe further.

    Co-ord mesh asymmetric midi set, beaded (ASOS Design). A standout for events and nights out. The asymmetric skirt and matching top feel special, and a co-ord always looks more expensive than it is.

    Blaine maxi skirt (Runaway The Label, Revolve). The perfect drape. Style it with the halter top for evening, or the rib tee and flats for an easy daytime look.

    Statement one-pieces

    Kiko strapless wide-leg jumpsuit, lime green (Lulus). A full outfit in one bold piece. A showstopper for a party or event, and the wide leg makes it surprisingly comfortable to wear all night.

    Shoes to finish

    Braided flats (H&M). The comfortable shoe that finishes almost anything in this edit. They go with the midi dresses, the skirts, and jeans. An easy budget win.

    Nelly almond-toe Mary Janes (Vivaia). The cute-shoe trend that actually feels good to walk in. Vivaia makes them machine-washable and cushioned, so they hold up to real, all-day wear.

    How I style these by occasion

    The same handful of pieces makes cute outfits for completely different plans. Here’s how I restyle this edit across a typical week.

    • Going out: the plum Ruby top or a halter, with jeans or a maxi skirt, a strappy heel, and a bold lip. Instant night-out energy.
    • Brunch or daytime: the Provence day dress, or the rib tee with the green midi skirt, braided flats, and gold hoops. Easy and cool.
    • Work or events: the pinstripe shirt or the Heartloom set with Mary Janes, kept clean and polished with simple jewelry.
    • Date night: a satin Zaria midi, or the off-shoulder top with a slip skirt, a heel, and your favorite scent.
    • Weekend casual: the rugby polo or ribbed tank with jeans and flats. Comfy but still put-together.

    Cute outfit mistakes to avoid

    Most outfit misfires come from a few small habits, not from the clothes themselves.

    • Too many statement pieces at once. Let one item lead and keep the rest simple, or the look competes with itself.
    • Skipping the waist. An untucked, unshaped outfit reads sloppy. Tuck, cinch, or choose pieces that define the middle.
    • Too many colors. More than three tones usually looks busy. Tighten the palette for an instantly more expensive look.
    • The wrong shoes. A great outfit with tired shoes falls flat. Let the footwear match the occasion.
    • Buying for a fantasy life. The cutest outfit is the one you’ll actually wear. Shop for your real week, not an imaginary one.

    How I picked these pieces

    This isn’t a random algorithm grab. Across summer and early fall 2026, I’ve been building outfits from these exact finds, keeping only the pieces that mix easily with what I already own, flatter in real life, and feel comfortable enough to wear for a full day or night. Anything scratchy, badly fitted, or a one-time-wear got left out.

    The result is a tight, mix-and-match edit of 22 pieces that actually work together, which is the only standard that matters to me.

    FAQ

    How do you put together a cute outfit? Start with one hero piece like a satin midi dress or a matching set, then keep everything else simple. Balance a fitted piece with a looser one, define your waist by tucking or cinching, and stick to two or three colors. Finish with shoes and a bag that match the occasion, plus one small personal detail like gold hoops.

    What makes an outfit look cute? When it’s flattering, intentional, and has a little fun to it without looking overdone. Good proportions, a defined waist, and a tight palette of two or three tones. One thoughtful detail, like a claw clip or gold hoops, pulls it together. Cute is less about expensive clothes and more about combining a few good pieces well.

    What are the easiest cute outfits? One-and-done pieces. A flattering dress or a matching co-ord set removes all the styling guesswork. Just add shoes, a bag, and a small detail, and you’re done. A satin midi dress, a mesh two-piece set, or a bold jumpsuit each give you a full, put-together look with almost no effort.

    A note from Ava

    The point of a cute outfit was never to impress anyone else. It’s that little lift you feel when you catch your reflection and think, yes, this is me, and I feel good. Take these finds as a starting point, mix them with what you already own, and make the looks your own.

    For more, see my fall capsule wardrobe and my everyday casual outfit ideas.

    Keep Reading

  • Two Messy Buns in Two Minutes: The Shortcut When You Have Nothing to Wear

    Two Messy Buns in Two Minutes: The Shortcut When You Have Nothing to Wear

    I stood in front of my closet this morning with a perfectly good sweater on and that feeling like nothing was quite right. You know it — the top works, the jeans work, but something’s missing. Half the time, the answer isn’t another piece of clothing. It’s your hair.

    A messy bun is one of those moves that makes an outfit look intentional without actually costing you anything. Two buns takes it a step further: playful enough for brunch, simple enough for a weekday morning when you’d rather sleep five extra minutes than fight with a blow dryer.

    Two Messy Buns in Two Minutes: The Shortcut When You Have Nothing to Wear - photo 2

    Here’s how I do it — two steps, under three minutes if you don’t count the coffee part.

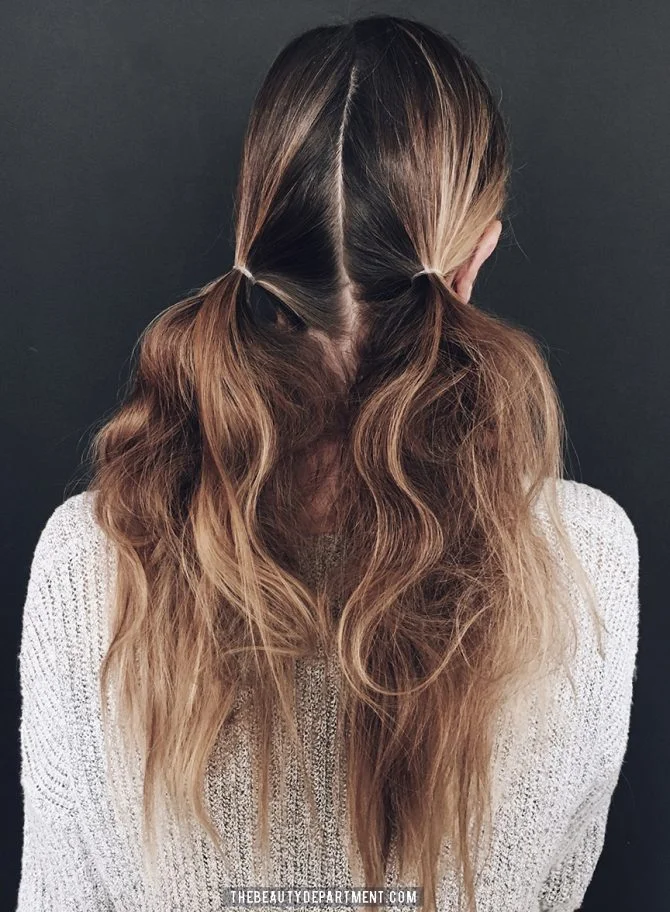
    Step 1: Two low ponytails

    Part your hair down the middle and make two low ponytails behind your shoulders. Not tight — these aren’t going to a meeting. Lightly tease the base of each pony with a comb if you want lift, then mist with texture spray so there’s grip.

    Two Messy Buns in Two Minutes: The Shortcut When You Have Nothing to Wear - photo 1

    Texture spray is the key here. It gives that piece-y hold without making hair feel crunchy. I’ve had good luck with drugstore options under $15 — look for anything labeled “volume” or “beach texture.” If you prefer a sleeker finish instead of tousled, skip the spray and smooth a bit of shine pomade from roots to ends. Both approaches work; pick based on your hair type.

    Step 2: Wrap and pin

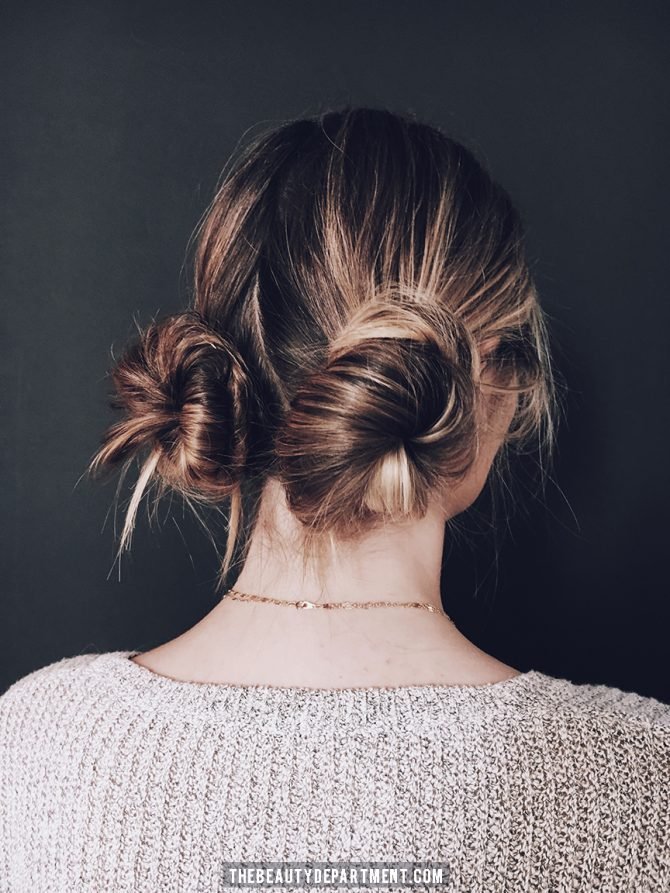
    Wrap each ponytail around its base until it forms a small bun. Secure with one large bobby pin through the center, then add two U-pins along the outside edge so the wrap doesn’t unravel while you’re walking to your car.

    Two Messy Buns in Two Minutes: The Shortcut When You Have Nothing to Wear - photo 3

    Here’s the part nobody talks about: let them fall apart a little. Pull out small face-framing pieces in front. Spray lightly with hairspray if it’s a windy day, otherwise skip it entirely. The whole point is that these should look like you didn’t try too hard.

    A few things I’ve learned

    • Second-day hair works best. Freshly washed hair slides right out of the pins. If your hair was washed yesterday, it holds better and has natural texture already built in.
    • Thin hair? Tease more. A bit of back-combing at the base adds volume so the bun doesn’t look flat against your head.
    • Thick hair? Split into three sections per side. Wrap each section separately for a fuller, more defined bun instead of one dense knot.

    Frequently asked questions

    Do I need any special products?

    No. Texture spray helps but isn’t required — dry shampoo or even a light hold hairspray works as a substitute. The pins are the only non-negotiable item.

    Will this work with short hair?

    If you can gather enough length to wrap around once, yes. Shoulder-length or longer is ideal, but chin-length bob hair can still do a mini version of this look.

    How long does it hold?

    I’ve worn these through a full day — commute, office, errands — and they stay put. The buns loosen as the day goes on, which is fine; that’s part of the messy aesthetic.


    A note from Ava: I keep two extra-large bobby pins in my bag at all times now. Not for this hairstyle specifically — just because hair emergencies are real and a single pin does more than you’d think.

    Keep reading

  • 14 Skincare Favorites I Keep Reaching For

    14 Skincare Favorites I Keep Reaching For

    I opened my bathroom cabinet last weekend and pulled out everything I’d actually repurchased. Not the half-empty tubes sitting in the back, not the gifts I feel guilty throwing away — just the products that earned their place.

    My skin is combination (dry in some spots, oily in others), which means most routines are a negotiation. After years of trial and error, these 14 items are what keep things from falling apart.

    Cleansers

    14 Skincare Favorites I Keep Reaching For Every Morning and Night - photo 3

    Origins Face Wash — This is the one I grab without thinking. It smells like peppermint, which makes morning face-washing something I don’t dread anymore. Most importantly, it handles my combo skin without over-drying or leaving a film. I’ve been buying this for years.

    Tatcha Cleansing Oil — If you haven’t tried cleansing oil yet, start here. It dissolves every layer of makeup without me needing to follow up with wipes. My skin feels clean, not stripped. This one changed how I think about removing makeup entirely.

    Sunscreen

    Shiseido Sunscreen — I don’t leave the house without sunscreen. Ever. I rotate between this and the Clarins version depending on what I’m feeling, but Shiseido is the default. Light enough to wear under everything.

    Moisturizers

    14 Skincare Favorites I Keep Reaching For Every Morning and Night - photo 2

    Clinique Moisturizing Gel — Since my skin leans oily, a gel formula makes more sense than anything heavy. This has been in rotation for years and doesn’t clog or sit on top of my face.

    14 Skincare Favorites I Keep Reaching For Every Morning and Night - photo 1

    Huxley Anti-Gravity Cream — I found this at a Korean beauty pop-up inside Nordstrom in LA. The sales associate talked me into trying it, and I ended up buying the full size. My skin feels completely reset in the morning, and the scent is subtle but noticeable. You can order it online if you don’t have a Nordstrom nearby.

    Face Masks

    14 Skincare Favorites I Keep Reaching For Every Morning and Night - photo 4

    Fresh Sugar Polish — First thing: this smells incredible. Second, my face feels smooth and bright right after using it. It’s a scrub-mask hybrid that I use when I want something to do.

    Glossier Moisturizing Mask — My roommate gave me this, and now I keep it for those days when my skin is dry and cranky. One thick layer on before bed and I wake up feeling like it actually worked.

    14 Skincare Favorites I Keep Reaching For Every Morning and Night - photo 6

    Origins Rose Clay Mask — Another Origins hit. I use this when I want something calming but still effective. It dries down without cracking, which says something about the formula.

    Origins Charcoal Clay Mask — This one is for deep cleaning. Pores feel clearer afterward, and my skin looks less congested. I keep it in rotation with the Rose Clay version depending on what my face needs that week.

    VT Instant Recovery Mask — Also picked up at that same Nordstrom Korean beauty pop-up. I used it one evening and was surprised by how soft and fresh my skin felt the next morning. It’s a sheet mask, simple but effective.

    Serums and Toners

    14 Skincare Favorites I Keep Reaching For Every Morning and Night - photo 5

    Caudalie Detox Oil — I put this on almost every night before bed. My skin looks revived in the morning, like it actually rested. I’m already onto my third bottle.

    Mario Badescu Facial Spray — You’ve probably seen this everywhere, and yeah, the hype checks out. I keep it on the counter and mist throughout the day when my skin feels tight or dull.

    Caudalie Moisturizing Toner — This carried me through last winter. I apply it right after washing, before anything else. It doesn’t sting and it preps without adding heaviness.

    Origins Renewal Serum — Several nights a week, this goes on before moisturizer. I really enjoy the results, though honestly I think I just love Origins as a brand at this point (as you can probably tell).

    Origins Night-A-Mins Cream — Can you tell I’m an Origins fan? Full transparency: this post is not sponsored by them. But this night cream sold out so often that I had to wait on backorder, which says enough about why it’s popular.

    A Quick Note

    I buy all of these myself — nothing here was sent to me for review. Some were gifts (the Glossier mask from my roommate), some I found by accident in store (Huxley and VT at Nordstrom). The rest are just things I keep repurchasing because they work.

    Frequently asked questions

    What skin type is this routine for?

    Combination skin — dry in patches, oily in the T-zone. If your skin runs more one direction than the other, you might swap out a couple of items.

    How much would all of these cost together?

    Roughly $300-500 depending on sales and where you shop. I don’t buy everything at once though — most sit in rotation and get repurchased over months or years.

    Are the Korean beauty products easy to find?

    The Huxley cream and VT mask were both available online through Nordstrom, so you don’t need a trip to LA for them. Most major retailers carry these brands now.

    Your turn

    What are the skincare products you reach for without thinking? I’m always looking for new things to try, so drop your favorites in the comments.


    A note from Ava: Skincare is one of those things where less noise and more consistency wins. I’d rather have ten products that actually work than a shelf full of half-used promises.

    Keep reading

  • NSale Try-Ons Round 2: What I Actually Wore (Plus Two Rack + Evereve Steals)

    NSale Try-Ons Round 2: What I Actually Wore (Plus Two Rack + Evereve Steals)

    By the time the third box arrived that week, I’d stopped counting. More try-ons for you: this round is a mix of new Nordstrom Anniversary Sale pieces I’ve been itching to get my hands on, plus two summer finds from Nordstrom Rack and Evereve. For context if you’re outside the US, the NSale is Nordstrom’s big annual event where early-fall collections go on sale — the best prices of the year on a lot of it.

    A couple of the pieces here have been in earlier posts on the site, but today they finally get styled into actual outfits, so you can see how they work in real life. And heads up: a few of the pieces I’ve been sharing have already sold out. If something catches your eye, order it now and try it at home while it’s in stock.

    Sizing note: I’m 5’6″ and I usually wear S/M or a size 6 in clothes and 8.5–9 in shoes.

    Summer pieces from Nordstrom Rack

    Gauze top — I’m wearing size S

    I’ve said it before and I’ll say it again: a gauze top like this is a summer staple. It’s breathable, it keeps you cooler, and that loose texture does a lot for an otherwise plain outfit. It comes in two neutrals and seven brighter colors — I grabbed this yellow one for $29.97, and you can find it here.

    For reference on the jeans: those are the KUT From the Kloth wide-leg pair from my first NSale post. I’m wearing a size 4, because they run big.

    Floral eyelet top — I’m wearing size S

    This one is the cute one. The print and embroidered detailing make it look a little special without any effort on your part, and it’s light enough for July heat. It’s under $35, here.

    The way I’d actually wear it: denim shorts and sandals right now, then the same top with jeans and flats for early fall. One piece, two seasons.

    Halogen drawstring pants — I’m wearing size S

    The berry drawstring pants from the NSale, back again with the eyelet top. They’re lightweight, the fabric moves, and the drawstring waist makes them easy to live in. Nordstrom files them as a dress pant, but I think that undersells them. T-shirt and sneakers on a weekend, a blouse and heels for work — they do both.

    Full outfit: top (size S), jacket in a different colorway (size S), pants (size S, part of the NSale), shoes (size 9).

    More Nordstrom Anniversary Sale try-ons

    Vince Camuto boots — I’m wearing size 9

    I teased these in my newsletter; here they are in an actual outfit. They might be my favorite boots in this sale. Soft upper, cushioned footbed, a pointed toe that polishes everything it touches, and a heel low enough to actually walk in.

    The taupe is gone, but there’s a snakeskin-textured pair in dark brown still available, and it’s beautiful.

    Short dolman sleeve sweater — I’m wearing size S

    Relaxed without looking sloppy — that’s the whole pitch, and it works. It comes in several colors and I genuinely cannot decide which ones to keep, so you’ll see a few across these photos.

    I mentioned in my first try-on post that I wanted to try a size down. Did it: size XS fits, but the relaxed drape disappears. If you prefer a closer fit (just not skin-tight), size down. Otherwise, stay in the S.

    Wit & Wisdom plaid pants — I’m wearing size 4

    Soft, stretchy, they feel like yoga pants but read like work pants. If your workwear is starting to show its age, these are worth trying. The necklace I’m wearing is here — code TAKE20 takes 20% off, and they back every piece with a lifetime guarantee.

    Wit & Wisdom black pants — I’m wearing size 4

    If the plaid isn’t your thing, the black pair is just as good. Super stretchy, soft, but the leg line is straight and clean, so they still look put-together. Comfortably comfortable, in the way that matters.

    Blondo waterproof Alida boots — I’m wearing size 9

    Last year’s NSale favorite boots are back in the sale. I’m wearing them in black here, but they also come in chocolate brown and taupe this year. The toe is square but not sharp, which gives you polish without trying too hard. And being water-resistant means a rainy morning doesn’t end with you changing shoes at the office.

    Black bomber jacket — I’m wearing size S

    If you want a moto jacket with a bit more character, this one has elastic cuffs and a tall collar that make it interesting. It’s PU leather and it does run a little shiny — if you want matte faux leather, look elsewhere. If the shine works for you, at least order it and see it on your own body.

    Full outfit: tee (part of the NSale, size S), jacket (size S), KUT From the Kloth jeans (size 4), sneakers (size 9), and the necklace (20% off with code TAKE20, lifetime guarantee).

    Fleece bomber jacket — I’m wearing size S

    This is exactly what I hoped it would be: thick, warm, and structured enough to feel like a real jacket. I’m already planning it for school pickups and practice days. I’m still on the fence about picking up the black one too — there’s a casual-coat gap in my wardrobe that’s been nagging me for a while.

    Nordstrom tall boots — I’m wearing size 9

    Shared in my first NSale post, finally styled here. The toe is pointed but not pointy, the leg line is clean and elongating, and the heel is low enough for a full day. I’m also a fan of the chocolate brown — rich without feeling costume-y, and it’s the kind of color that works for years, not just this fall.

    Balloon sleeve dress — I’m wearing size 6

    This dress pairs that well with the chocolate tall boots that I had to photograph them together again. In my first review I noted the zipper stuck in three spots, so I ordered a second one to give it a fair shot. This time it didn’t stick.

    Which leaves me with a decision: do I actually need this dress? Nordstrom’s return window is long, so I’m taking my time and thinking it through before I decide.

    Ribbed pajama set — I’m wearing size S

    No photos on this one, but if you need new pajamas, check it out. It’s soft, breathable, and the shorts run a bit longer than most, which I appreciate.

    The Evereve finds

    Full disclosure: I’d been admiring Evereve’s clothes for a while without ever buying, mostly out of fear of getting hooked. They sent a few pieces from their new arrivals to try — I wasn’t required to share, I’m sharing because I love them.

    Barrel-leg track pants — I’m wearing size S

    These are admittedly on the pricey side, and I love them anyway. I’m not a barrel-leg person in general, but these proved me wrong on one thing: a little shape in athleisure keeps it from looking like you just rolled out of the gym. They’re track pants — soft, movable — but they hold their shape, and they’re breathable, which more of these should be. Sizes are limited, so if you can get them, I’d recommend it.

    Full outfit: tee (size M), sneakers (size 9), and the necklace (20% off with code TAKE20, lifetime guarantee).

    Sanctuary balloon pants

    Trendy, a little childhood-throwback, and genuinely one of the most comfortable breathable pants I’ve tried this year. If the barrel-leg pants above sold you on shape, these are the softer version.

    Full outfit: tee (size M), sandals (size 8), and the necklace (20% off with code TAKE20, lifetime guarantee).

    Quick reference

    PieceBrandSize wornPrice
    Gauze topRack (via Nordstrom Rack)S$29.97
    Floral eyelet topNordstrom RackSUnder $35
    Halogen drawstring pantsHalogenSNSale price
    KUT wide-leg jeansKUT From the Kloth4NSale price
    Vince Camuto bootsVince Camuto9NSale price
    Short dolman sleeve sweaterHalogenSNSale price
    Plaid pantsWit & Wisdom4NSale price
    Black pantsWit & Wisdom4NSale price
    Alida waterproof bootsBlondo9NSale price
    Black bomber jacketVince CamutoSNSale price
    Fleece bomber jacketBernardoSNSale price
    Tall bootsNordstrom9NSale price
    Balloon sleeve dressCeCe6NSale price
    Ribbed pajama setNordstromSNSale price
    Barrel-leg track pantsEvereveSPricey
    Balloon pantsSanctuary——

    FAQ

    Is the Nordstrom Anniversary Sale still running?

    Yes — it’s still going strong through August 9th. That’s your window to grab anything from this list before sizes disappear.

    I saw some of these pieces before. Why are they here again?

    Some pieces were in my first NSale try-on post. I’m restyling them into outfits here so you can see them working in real life — and a few are back on sale, which is the part worth knowing.

    Do I need to order anything to try it at home?

    If a piece is selling fast, yes — that’s the move. The NSale return window is long, so ordering early to try at home is low-risk.

    A note from Ava: The best part of sale try-ons isn’t the buying — it’s the sorting. By the end of the week I’ll have kept a handful of these and returned the rest, and the ones I keep will get worn to death in the next two months. That’s the whole point of buying on sale: you’re not spending money, you’re just moving the decision later.

    If you want to keep browsing: First Glance NSale favorites, and the first round of try-ons if you missed it.

  • How to Lighten Your Foundation for Winter Without Changing Your Undertone

    How to Lighten Your Foundation for Winter Without Changing Your Undertone

    Every January or February, I look in the mirror during my morning routine and think: since when is my foundation two shades too deep? It happens every year. You find the perfect match for summer, log it somewhere (a notebook if you’re organized, a sticky note on the bathroom mirror if you’re not), and then winter hits.

    My skin — like most people’s — gets a shade or two lighter when the sun disappears. And suddenly that foundation you loved in September is sitting on your face like a mask.

    How to Lighten Your Foundation for Winter Without Changing Your Undertone - photo 2

    The problem with just buying a new shade

    Here’s what drives me crazy about most foundation lines: they don’t give you the same shade, just lighter. A lot of brands jump from a yellow medium to a pink medium to some neutral option in between — when all you actually want is your regular shade, only a little less deep.

    Dropping down a full shade changes your undertone. Mixing two foundations together works sometimes but tends to look streaky. I’ve tried every workaround over the years, and honestly, none of them felt right until I discovered white shade-adjusting drops.

    What white drops actually do

    A few drops of pure white mixed into your foundation lightens it without shifting whether your undertone is cool or warm. It’s that simple. You keep the exact color family you matched in summer and just bring it up a notch for winter.

    What you need

    • White shade-adjusting drops: I’ve used high-end options around $40–$50, but there are solid drugstore picks under $15 and water-based versions in the same range. You don’t need to spend a lot.
    • Your go-to foundation: Use whatever you already wear. Full coverage, medium, or light — it works with any formula.
    How to Lighten Your Foundation for Winter Without Changing Your Undertone - photo 1

    Step-by-step: how to mix white drops into your foundation

    1. Squeeze out your usual amount of foundation. Put it on the back of your hand or a small palette — wherever you normally work with product.
    2. Add one drop of white adjuster. Start with just one. You can always add more, but you can’t take it out once it’s mixed in.
    3. Swirl to combine. Use your finger or a small brush to swirl the two together until you don’t see any separate streaks of white.
    4. Check the color on your jawline. Dab a tiny bit along your jaw and blend it into your neck. If it still looks too light, go back to step 2 and add another drop.
    5. Apply as normal. Once the shade matches, use your usual application method — sponge, brush, or fingers — and finish like you normally would.

    A few tips from experience

    • If you have a deeper skin tone, you might need two or three drops instead of one. Start small and build up.
    • Don’t mix more than you’ll use in one sitting. Once the white is blended in, the lighter shade doesn’t last on the palette all day.
    • This trick works for tinted moisturizer and BB cream too — not just full-coverage foundation.

    FAQ

    Will white drops change my foundation’s finish?

    Sometimes, yes. If your adjuster is oil-based and your foundation is water-based (or vice versa), you might notice a slight texture shift. The best approach is to match bases — oil with oil, water with water. Most drugstore drops are affordable enough that you can test one before committing.

    Can I use this trick in summer too?

    You absolutely can. If a new bottle of foundation arrived and it’s a touch lighter than your current tan, a drop or two of white helps you dial it in perfectly instead of waiting for it to match naturally.

    How many shades lighter can I go?

    Roughly one to two shades. Beyond that and the foundation starts looking ashy or gray, especially on deeper skin tones. If you need a bigger shift, it’s better to have two foundations close together and mix those instead.

    Why this matters (beyond saving money)

    Sure, white drops mean you don’t have to buy a second foundation for winter — which is great because foundations aren’t cheap. But the real win is consistency. Your undertone stays the same day to day. You’re not guessing whether the next shade down will turn pink or orange on your skin. It just works.

    For anyone who’s ever stood in a drugstore aisle holding three different foundations and still walked out with none of them — this is the shortcut you didn’t know you needed.

    A note from Ava

    I keep a bottle of white drops next to my coffee maker now, right where I do my morning face. It took me years to figure this out, and it still feels like cheating every time I use it.

    Keep reading

  • Best Victoria’s Secret Underwear: What I Actually Wear

    Best Victoria’s Secret Underwear: What I Actually Wear

    I was standing in front of my open drawer this morning, pulling out a cotton bikini that has survived a dozen wash cycles without losing its shape. That is when I realised: underwear is the one thing you wear every single day, and the wrong pair can quietly ruin an outfit or even your mood.

    The right pair, you never think about at all.

    This post contains affiliate links. If you purchase through them, I may earn a small commission at no extra cost to you. I only recommend products I have personally tested and genuinely love.

    As a Victoria’s Secret ambassador, I have worn my way through most of the underwear range, and I have clear favourites for every kind of day and outfit. Below are the styles I actually reach for, organised by type so you can find your match.

    The Best Victoria’s Secret Underwear Picks

    Every pair below is one I own and wear regularly. The short answer: the Cotton Bikini for everyday wear, the Seamless No-Show Thong for fitted outfits, and the High-Waist Cotton Brief for full-coverage comfort.

    Choose cotton when you want breathable daily wear. Choose seamless microfiber for anything tight or white. Match the cut to the outfit — a thong or seamless pair under fitted clothes, cotton bikinis or briefs for everyday.

    Cotton Bikini: The Everyday Go-To

    This is my default. Cotton is soft, breathable, and gentle on skin all day long. The bikini cut sits comfortably at the hips without digging in, and it works under everything from jeans to midi skirts. If you only keep one style, make it this one.

    Seamless No-Show Thong: Invisible Under Fitted Clothes

    The laser-cut edges lie completely flat, so there is zero visible line under leggings, white pants, or fitted dresses. I reach for this whenever an outfit leaves no room for guesswork. Pick a nude tone close to your skin colour under white fabrics.

    High-Waist Cotton Brief: Full Coverage That Smoothes

    If you carry most of your weight below the waist, you know the struggle of low-rise underwear that pinches or rolls down. The high-waist brief adds smoothing and security without squeezing. It is the most comfortable Victoria’s Secret underwear for all-day wear, hands down.

    How to Choose the Right Cut

    The best pick depends on what you are wearing and how much coverage you want. Owning a few styles, rather than just one, covers every kind of day and look.

    • Cotton vs. seamless: Cotton lets skin breathe and is the healthiest daily choice. Seamless lies flat under clothes but is less breathable. Most people are best served by owning both and matching them to the outfit.
    • Cheeky vs. thong: A cheeky offers moderate coverage with fewer lines than a full brief. A thong gives zero visible line — the choice when fitted clothes demand it.

    Fitting Tips

    Underwear should lie smoothly against your body without digging in, rolling down, or riding up. If the elastic leaves marks on your skin, it is too small. If it bunches or gaps, go a size bigger.

    Check the waistband and leg openings first. When you are between sizes, size up for cotton (it has a little give) and stay true to size for seamless (it needs to fit snugly to stay invisible).

    Use the brand’s size chart based on your hip measurement. If a pair leaves deep marks or rolls at the waist, adjust accordingly.

    When to Replace

    Most experts suggest replacing everyday underwear every six to twelve months, or sooner once the elastic stretches out, the fabric thins, or it stops fitting well. Underwear takes daily wear and frequent washing, so it wears out faster than other clothes. Buying a multipack makes refreshing a drawer easy and affordable.

    Is Victoria’s Secret Underwear Worth It?

    If you value a wide range of cuts, reliable sizing, and fabrics that hold up over time, yes. Multipacks make the everyday cotton styles good value. I keep restocking the cotton bikinis, seamless no-show pairs, and high-waist briefs because they stay comfortable and keep their shape.

    As with anything, the worth comes down to buying the styles you will actually wear.

    FAQ

    What is the best Victoria’s Secret underwear?

    For most people, it is the Cotton Bikini for everyday wear, the Seamless No-Show Thong for fitted outfits, and the High-Waist Cotton Brief for full-coverage comfort. The right pick depends on your outfit and preferred coverage.

    Which Victoria’s Secret underwear is most comfortable?

    The cotton range, especially the High-Waist Cotton Brief and Cotton Bikini. Cotton is soft, breathable, and gentle for all-day wear. The high-waist styles add smoothing without pinching.

    What underwear is best under leggings and white pants?

    Seamless underwear — the laser-cut or bonded edges lie completely flat with no visible line. The Seamless No-Show Thong and Seamless Bikini are top choices. Choose a nude tone close to your skin colour.

    The Bottom Line

    You do not need a drawer full of pretty pairs you never wear. A few comfortable, well-fitting styles for the outfits you actually live in beats a pile of uncomfortable ones every time.

    That is what I try to keep in mind — taking care of the small things so you can forget about them and feel like yourself.


    A note from Ava: The best underwear is the pair you forget you are wearing. When the foundation feels good, everything on top just sits better. If you want to refresh your whole drawer, my guide to the best Victoria’s Secret bras and my take on building real confidence through what you wear are the natural next reads.

    Keep Reading

  • 5 EDC Sling Bags That Carry More Than Your Pockets Can Hold

    5 EDC Sling Bags That Carry More Than Your Pockets Can Hold

    I was digging through my coat pockets on the subway last week when it hit me: my keys were in the left, my phone in the right, my cards somewhere behind a lining seam, and I still couldn’t find my earbuds. That’s when I knew — if a single bag can hold all that without turning into a backpack, it’s worth making the switch.

    A good sling does one job better than any pocket: keeps the small kit you actually use close, visible, and easy to reach. The catch is that EDC sling bags range from tiny phone pouches to 11-liter tactical haulers (roughly 671 cubic inches), so the right pick depends on what you carry every day.

    This guide compares five bags by carry job, not by pocket count. I’ve been testing sling bags for my own commute and weekend runs for a while now, and these are the ones that stayed in rotation long enough to earn a spot here.

    Affiliate disclosure: some of the links below are affiliate links, which means I may earn a small commission at no extra cost to you. Every recommendation is my own.

    Quick picks

    Prices were captured recently and move often, so confirm the listing before you buy.

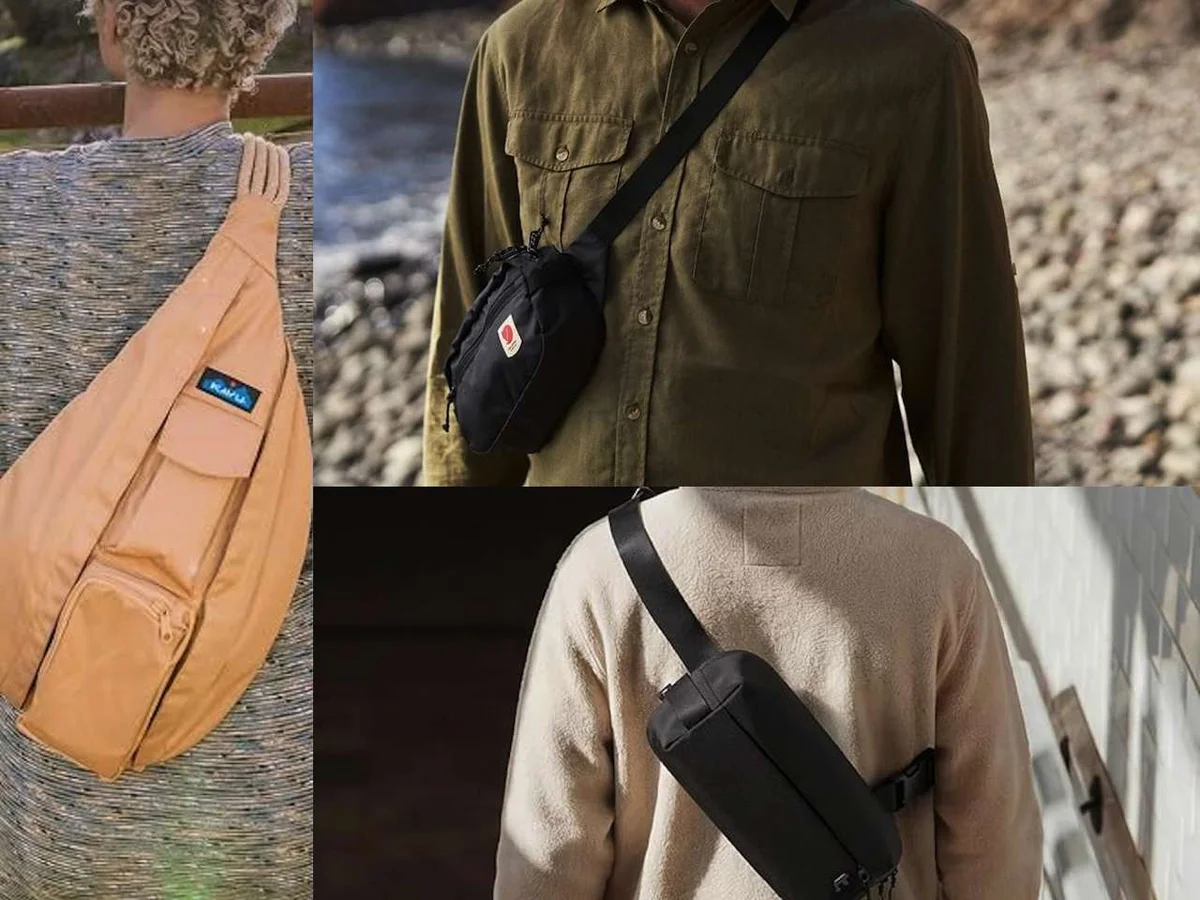
    KAVU Rope Sling — casual outdoor carry, 10 liters, $64.95
    Fjällräven High Coast Hip Pack — light travel carry, 1.5 liters, $41.45
    tomtoc Explorer-T21 S — tech and commute, 3 liters, $43.99
    5.11 RUSH MOAB 6 — tools and expansion, 11 liters, $85.00
    Victorinox Altmont Monosling — travel organization, 7 liters, $75.00

    KAVU Rope Sling handles casual outdoor carry

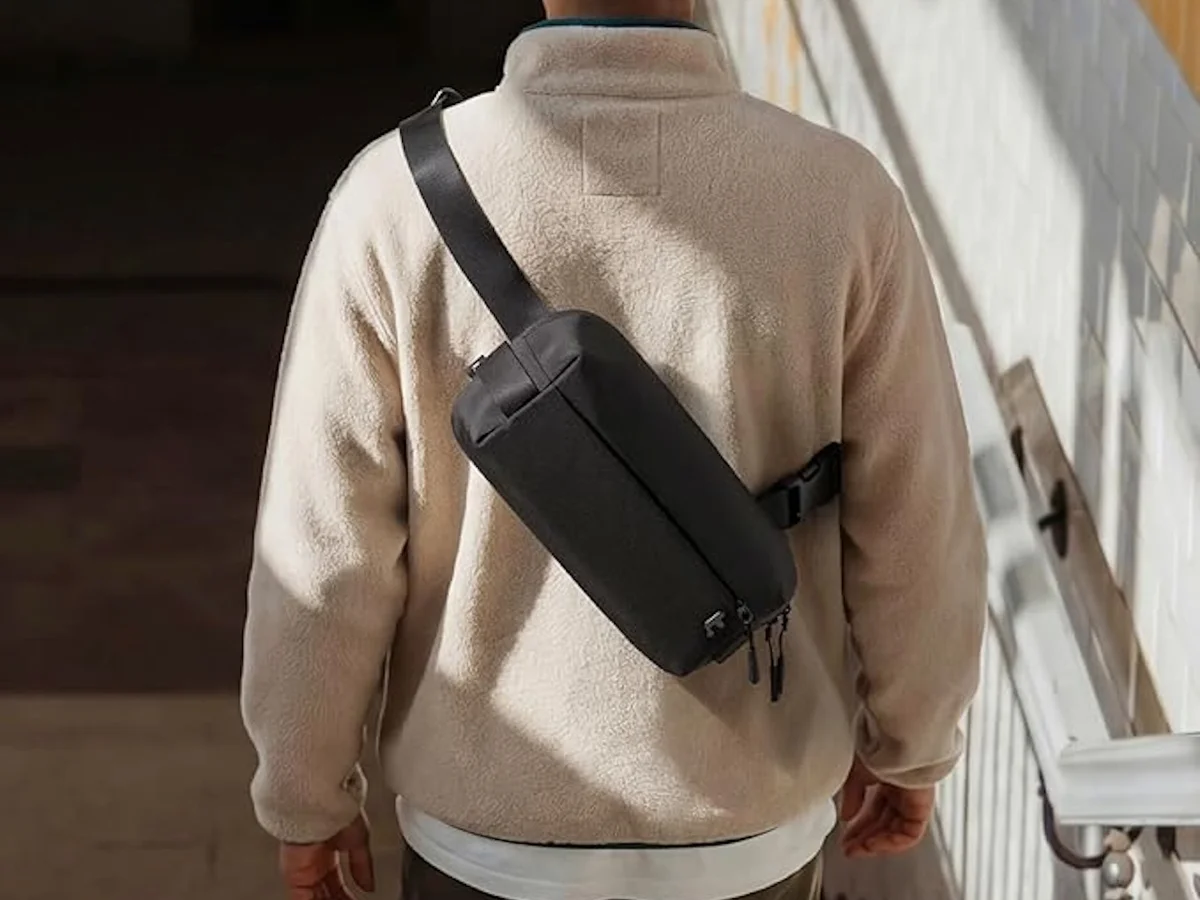
    KAVU Rope Sling casual crossbody bag product shot

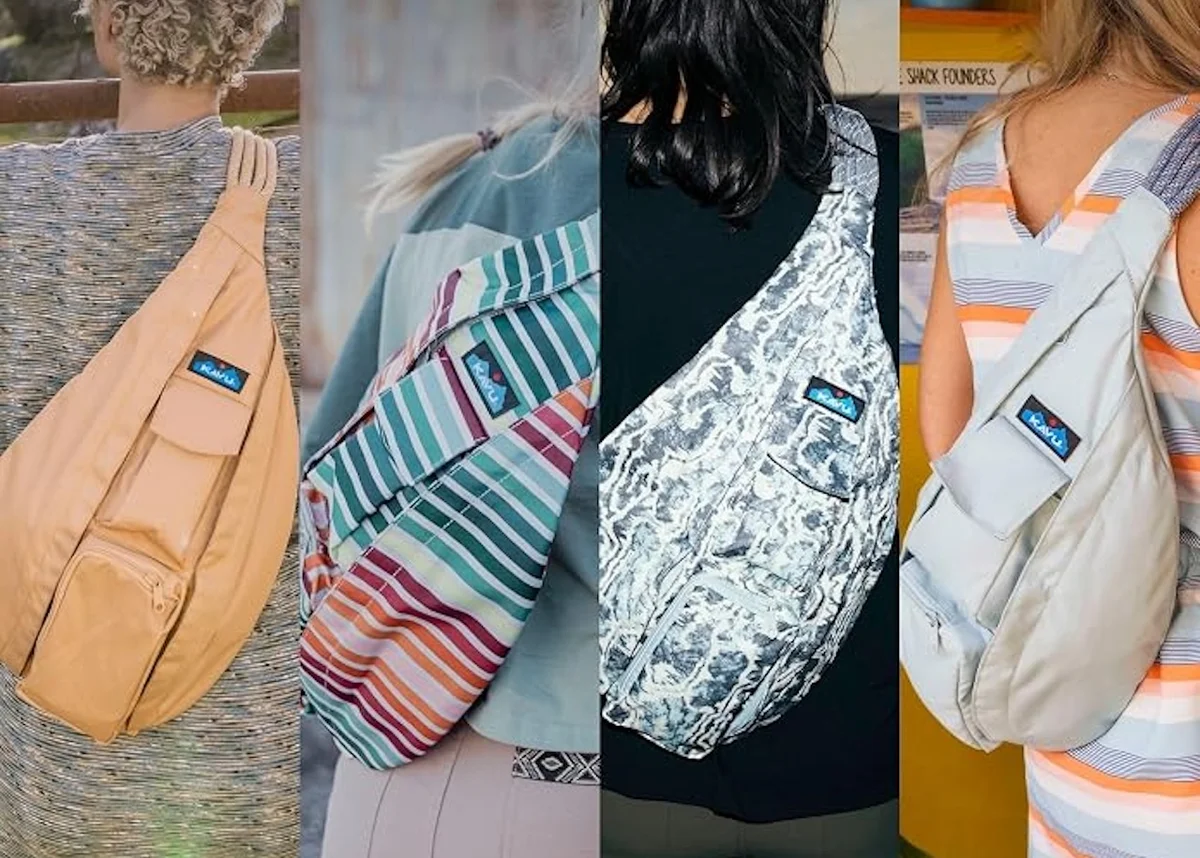
    The KAVU Rope Sling is the least tactical-looking bag in this group, which is exactly why I gravitated toward it. It has a 10-liter capacity, a rope shoulder strap with a side-release buckle, and two zip compartments. That’s room for a phone, wallet, glasses, a small camera, a charger, and a light layer — without looking like you’re wearing a miniature duty pack.

    Where it gives ground is organization. KAVU counts two vertical zip compartments plus two smaller key or phone pockets, which sorts the basics but leaves cables and chargers sharing one soft space. Pick it if your load leans toward sunglasses, snacks, a notebook, and outdoor odds and ends. Skip it if you want rigid protection for a tablet or camera.

    The rope strap is the defining design choice here. KAVU gives it a 22 to 44-inch adjustment range and puts a padded back panel behind it, but a narrow rope spreads load differently than a wide padded strap — so a fully packed 10 liters will sit harder on one shoulder. The bag itself weighs only 0.8 pounds in water-resistant 600D polyester, which means almost all the weight you feel is what’s inside.

    Buy it if: you want a comfortable, casual sling with real day-trip capacity.
    Skip it if: you need structured tech protection or a compact silhouette.

    Price: $64.95 | Where to Buy on Amazon

    The smallest option is the Fjällräven High Coast Hip Pack

    Carry less and the High Coast Hip Pack starts to make sense. Fjällräven builds it from 100 percent recycled 210D polyamide — a fabric the brand calls waterproof — then adds a key clip, a mesh pocket inside the main compartment, a security pocket on the back, and ventilating mesh for comfort against your body. One thing to know: Fjällräven notes that the seams are not taped and the zipper is not water-resistant, so the fabric holds out rain while the openings do not.

    At 1.5 liters this is a pocket extender, not a portable office. A tablet, large power bank, or bulky camera kit won’t fit, and at 4.4 ounces empty it folds into its own pocket when you don’t need it. It’s the cleanest choice for concerts, travel days, and city walks — anywhere a full sling would feel like overkill.

    Buy it if: your daily load is phone, wallet, keys, and a few small extras.
    Skip it if: you want room for a notebook, camera, or large charger.

    Price: $41.45 | Where to Buy on Amazon

    tomtoc Explorer-T21 S solves the commuter tech problem

    tomtoc Explorer-T21 S compact tech sling bag

    If you commute with a handful of gadgets, this is probably your best bet. The small Explorer-T21 comes in at 3 liters in a 12.2 by 5.9 by 2.95-inch profile, built from 840D polyester with YKK zippers and split into three compartments: a quick-access front pocket, a main section lined with elastic pockets, and a hidden back pocket for valuables.

    Structure is the whole argument here. A charger, earbuds, a power bank, and daily essentials each get somewhere specific to sit. Three liters covers a focused tech kit — tomtoc rates it to fit an iPad mini — so a full-size tablet or a spare layer is out. That ceiling is useful because it stops the bag from quietly turning into a second backpack.

    Two things before you order: confirm you’re buying the small size (tomtoc sells Explorer-T21 in more than one), and check tomtoc’s own store alongside Amazon — they’ve been listing the S at $39.60 against a $43.99 regular price.

    Buy it if: you carry small electronics and want compartments instead of one soft cavity.
    Skip it if: you need outdoor capacity or a bag that swallows a jacket.

    Price: $43.99 | Where to Buy on Amazon

    When your kit includes tools, look at the 5.11 RUSH MOAB 6

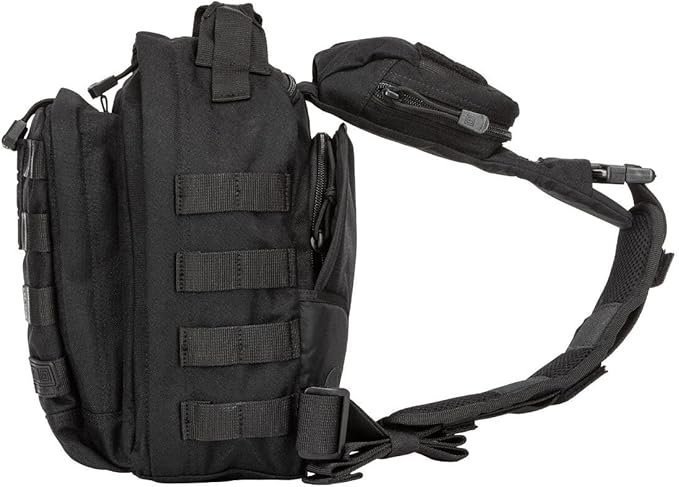
    5.11 RUSH MOAB 6 tactical sling bag on white background

    Nothing else in this group carries like the RUSH MOAB 6. It’s an 11-liter bag — that’s 671 cubic inches — built from 1050D nylon with a water-resistant finish and a MOLLE web platform across the exterior. At 2 pounds empty, it handles a genuine gear load: gloves, tools, first-aid supplies, a larger camera, or a tablet-sized daily kit.

    5.11 also builds in a covert rear pocket sized for a sidearm, a fleece-lined sunglasses pocket, an admin panel, and a sleeve rated for a 1.5-liter hydration bladder. The capacity that makes it useful also makes it easy to overpack, and 11 liters of loaded gear on one shoulder gets old faster than the spec sheet suggests.

    Tactical styling won’t read the same way in every office or city setting — but if you need one-shoulder access to a substantial kit, this is the bag that earns it.

    Buy it if: your EDC includes tools, layers, or emergency gear.
    Skip it if: you want a quiet, lightweight city sling.

    Price: $85.00 | Where to Buy on Amazon

    Victorinox Altmont Monosling was built for travel days

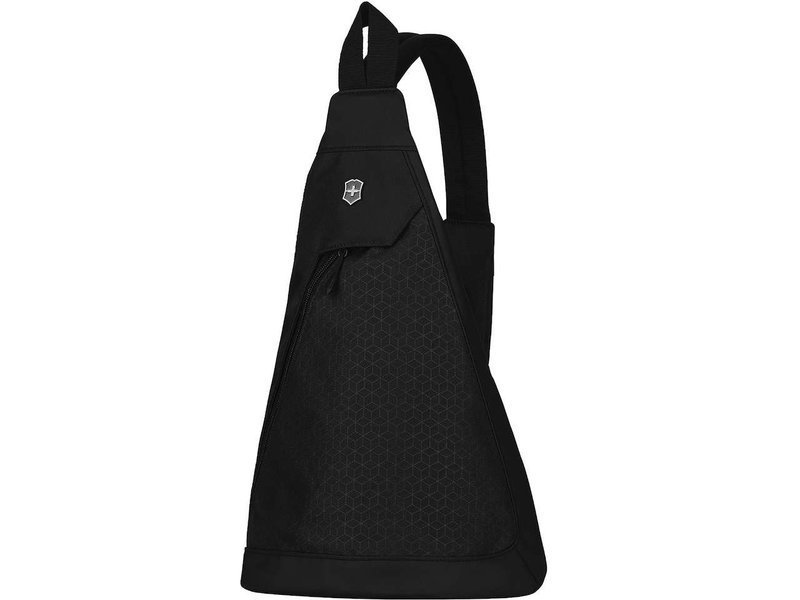
    Victorinox Altmont Monosling tall travel crossbody bag

    The Victorinox Altmont Original Monosling has a different job from everything else here. It measures 16.9 inches tall by 9.8 inches wide by 5.5 inches deep, holds 7 liters across dual compartments, and weighs 0.7 pounds in polyester — which describes a tall travel bag rather than a minimalist pocket carry.

    Victorinox lists two pockets on the shoulder strap (one zippered, one neoprene sleeve built for a Swiss Army Knife), plus a zippered front compartment with a snap cover and an interior slash pocket. A padded tablet sleeve sized to 10 inches appears in retailer listings, so check before you buy.

    The tradeoff is silhouette. A tall vertical bag works efficiently against your back on a concourse but feels awkward on a ten-minute walk for coffee. If most of your carrying happens between a gate and a hotel, this is the right compromise.

    Buy it if: you want one compact travel bag for a tablet, documents, and daily essentials.
    Skip it if: your carry list fits in a small hip pack.

    Price: $75.00 | Where to Buy on Amazon

    How to choose the right EDC sling

    Start with the object that usually breaks your pocket carry. If it’s a charger and earbuds, stay near 3 liters with the tomtoc. If it’s a jacket or a camera, move toward the KAVU or the Victorinox. If it’s a tool kit, the MOAB 6 gives you room to build around the gear instead of forcing everything into tiny pockets.

    Capacity isn’t the only decision. A soft sling feels less formal and compresses down when empty, while a structured bag protects electronics and keeps small items separated. A tactical bag adds expansion and access — but it also announces itself to everyone in the room. Match the bag to your actual load and your normal surroundings, and the capacity question tends to answer itself.

    FAQ

    Which sling bag is best for commuting?

    The tomtoc Explorer-T21 S at 3 liters gives you compartmentalized organization for small electronics without turning into a second backpack. It fits an iPad mini and keeps every cable in its own place.

    Is the Fjällräven High Coast Hip Pack waterproof?

    The fabric is 100 percent recycled polyamide that Fjällräven calls waterproof, but the seams are not taped and the zipper is not water-resistant. Light rain on the exterior won’t get through — water can enter through the openings.

    What’s the lightest bag in this comparison?

    The Fjällräven High Coast Hip Pack at 4.4 ounces empty. It folds into its own pocket when you don’t need it, making it ideal for days when you want to carry almost nothing.

    A note from Ava: I keep going back to the tomtoc on my weekday runs because it holds exactly what I need and nothing I don’t. The bag should solve a carry problem, not create a new one — and if you can’t name the specific object that pushed you out of your pockets, you probably don’t need a sling yet.

    Looking for more everyday essentials? Check out my guides on budget finds worth your money and building outfits that work from morning to night.

    Keep Reading

  • Taupe Brown: 6 Ways to Style This Summer Color

    Taupe Brown: 6 Ways to Style This Summer Color

    I was digging through my closet last week, trying to figure out what to wear on a morning that felt too warm for denim but not quite beach weather yet. That’s when I noticed how many taupe brown pieces I’ve accumulated over the past year — and how much I actually reach for them.

    Quince dropped taupe brown as a new color option, and if you haven’t tried it yet, here’s why it works so well in summer: it reads as warm without being heavy. Lighter than chocolate brown, softer than grey, and honest enough to pair with almost anything already in your wardrobe.

    Quince partners directly with factories, so their pieces tend to land at a fraction of traditional retail prices. I’ve built most of my capsule around their basics — tops, dresses, skirts that mix and match without looking like uniform.

    I pulled together six outfits below so you can see how versatile this shade actually is. Every item is linked in each outfit breakdown.

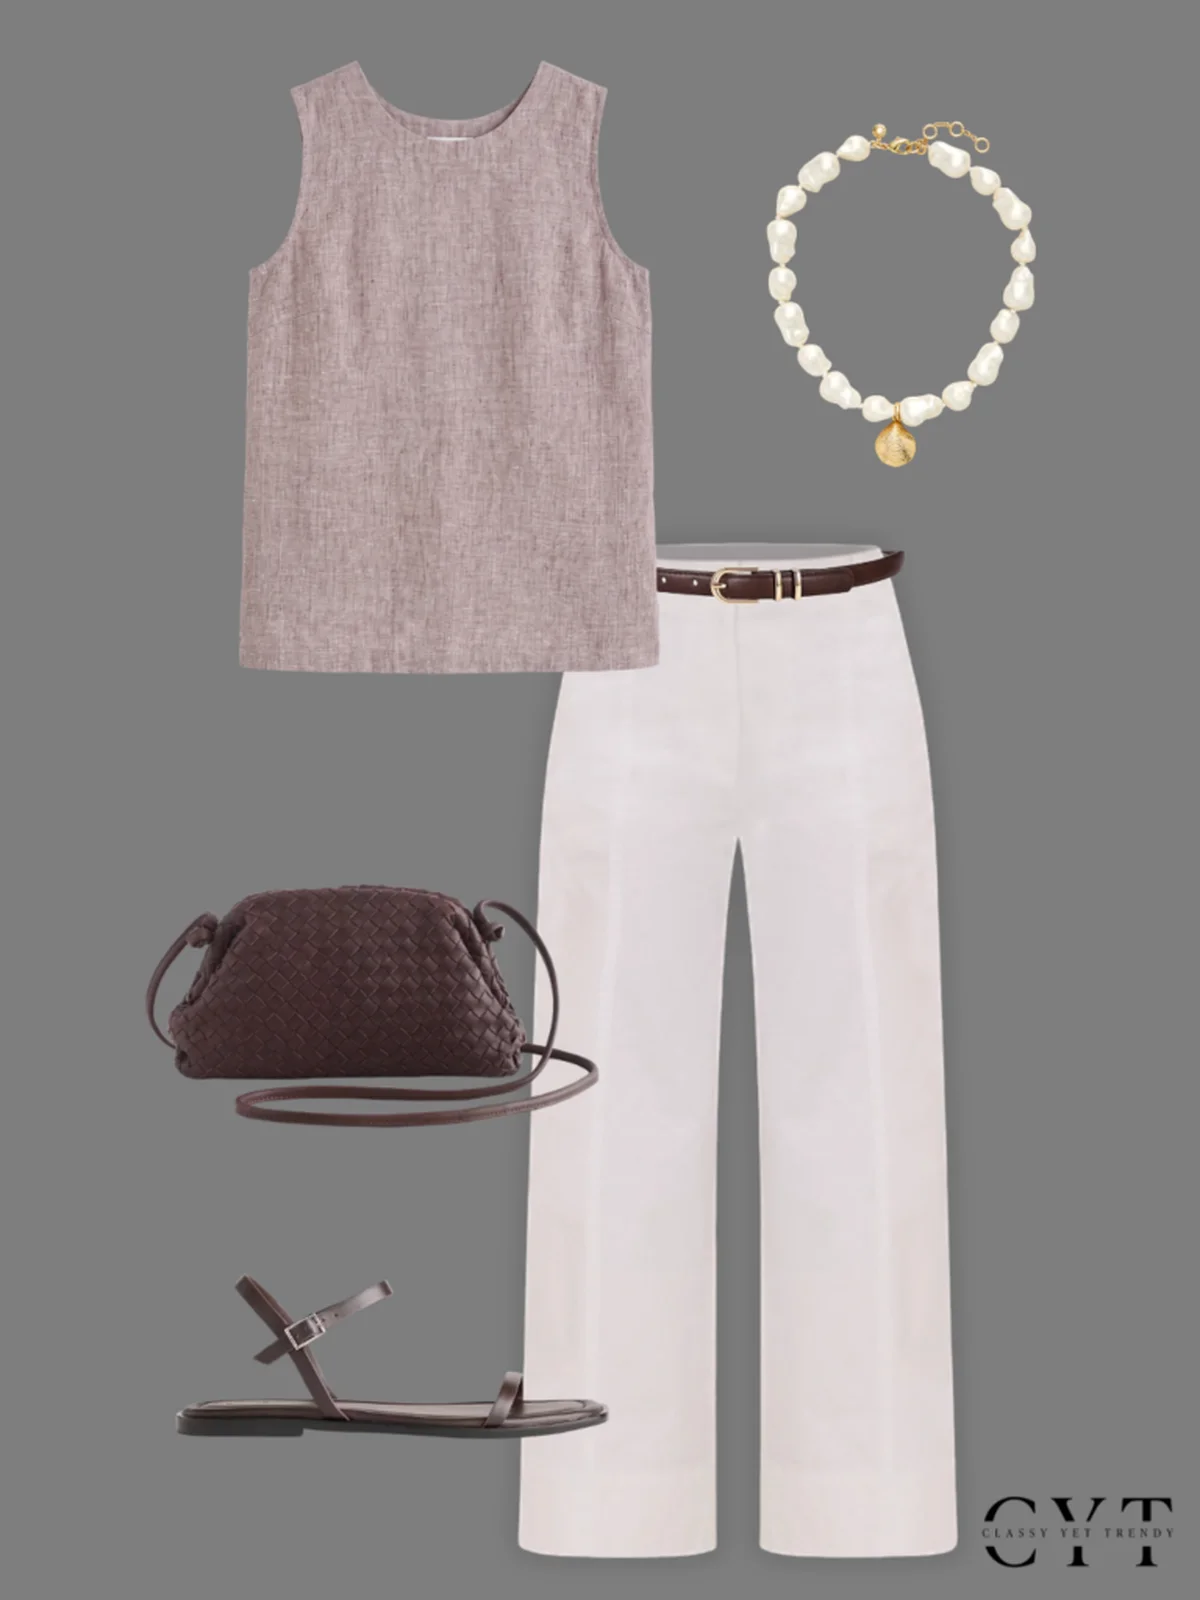
    Outfit 1: Gingham top with linen-blend pants

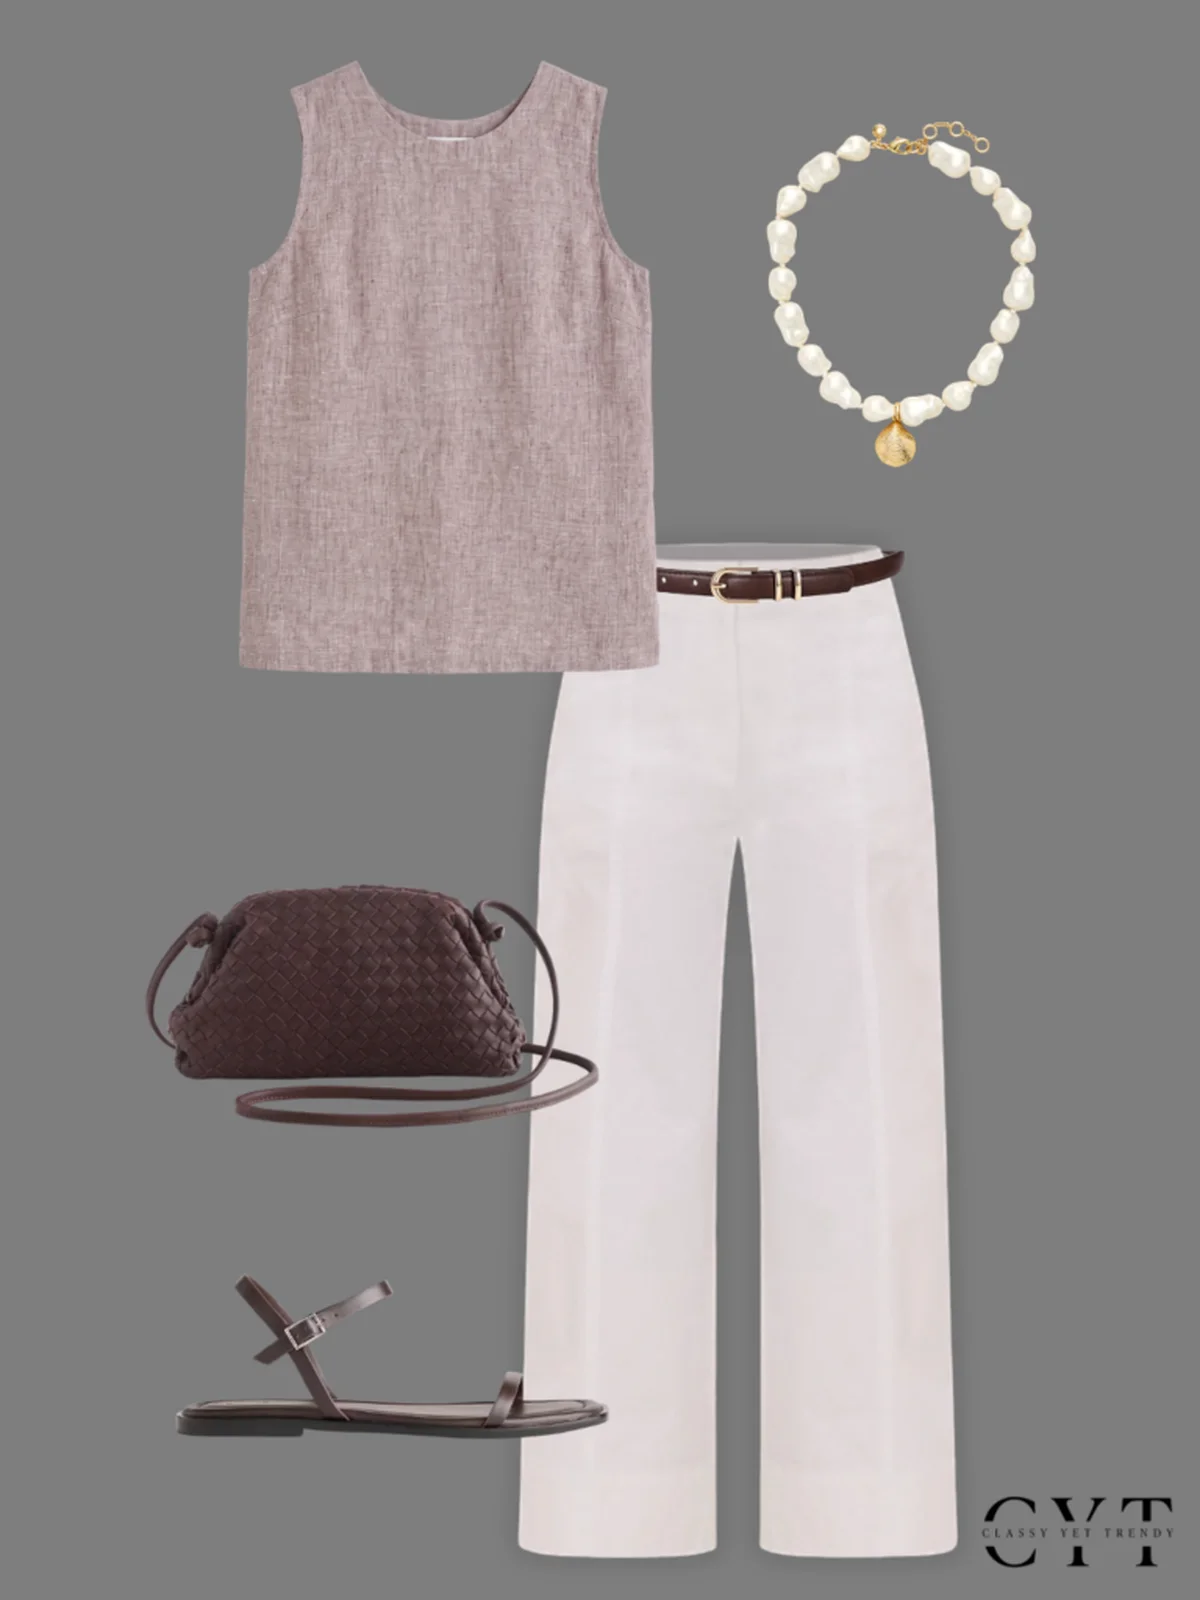
    Taupe brown gingham top with white linen-blend pants

    This is the one I’d wear to a weekday lunch or a casual errand run. The gingham pattern keeps it from reading too plain, and white pants always make a warm neutral look intentional.

    • Gingham Linen Top in “taupe brown gingham”
    • Linen-blend white pants
    • Strap sandals in “coffee bean” — I found these on Amazon
    • Pearl and gold necklace
    • Italian Leather Handwoven Pouch Crossbody Clutch in “dark brown”
    • Chocolate belt (comes in a 2-pack: black and brown)

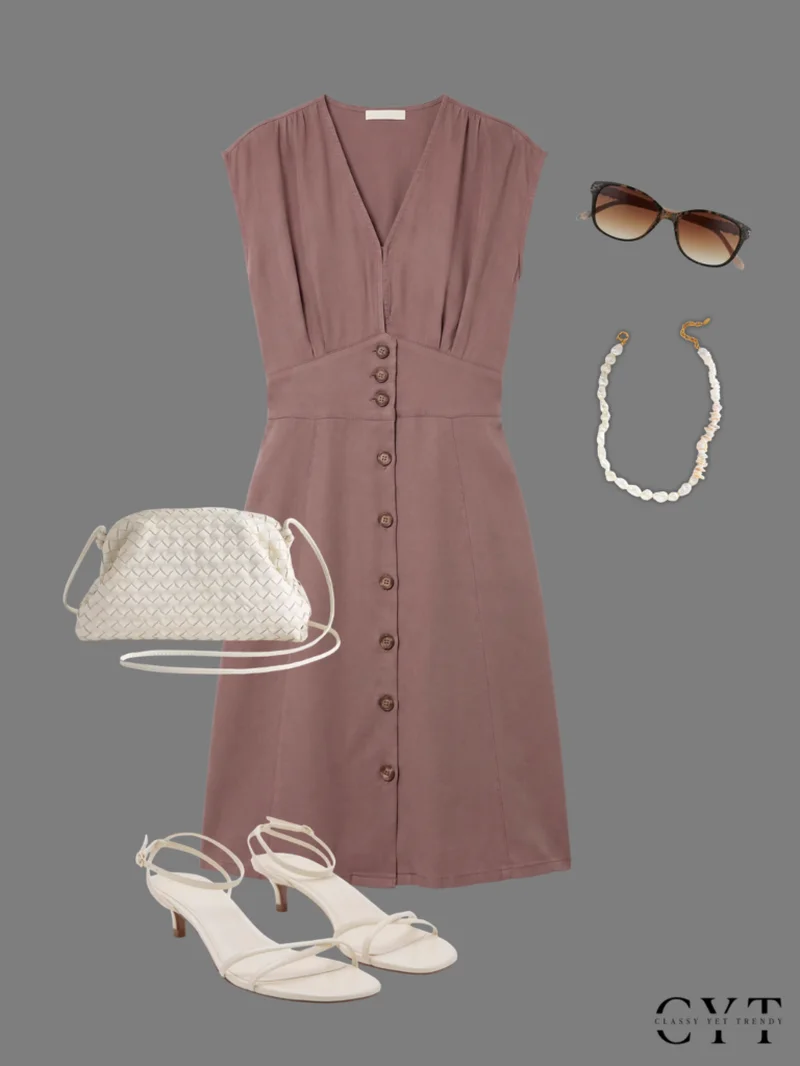
    Outfit 2: Button-front dress for brunch

    Taupe brown Tencel button-front summer dress outfit

    If you prefer to throw on one piece and call it done, this Tencel dress is the move. It drapes nicely and the taupe brown color keeps it feeling seasonally appropriate rather than autumnal.

    • Tencel Button Front Dress in “taupe brown”
    • Kitten Sandal Heels in “vanilla”
    • Italian Leather Handwoven Pouch Crossbody Clutch in “bone”
    • Cat Eye Sunglasses
    • Beachy Beaded Pearl Necklace

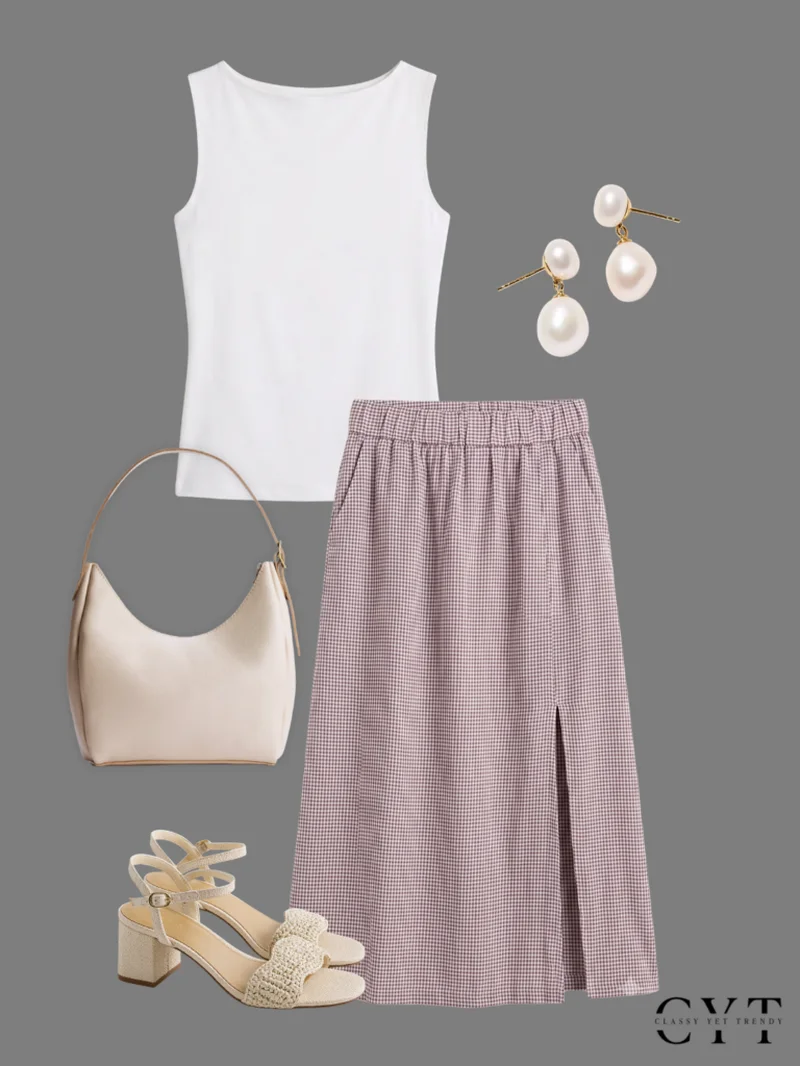
    Outfit 3: Maxi skirt with a boat neck tank

    Gingham maxi skirt paired with white boat neck tank

    A longer silhouette for days when you want coverage without sacrificing airflow. The gingham maxi paired with a simple white tank is the kind of combo I reach for when I’m running late and don’t have time to think.

    • European Linen Maxi Skirt in “taupe brown gingham”
    • Stretch Cotton Jersey Boat Neck Tank in “soft white”
    • Baroque Pearl Drop Earrings
    • Aspen Leather Shoulder Bag in “pebbled bone”
    • Raffia Heeled Sandals

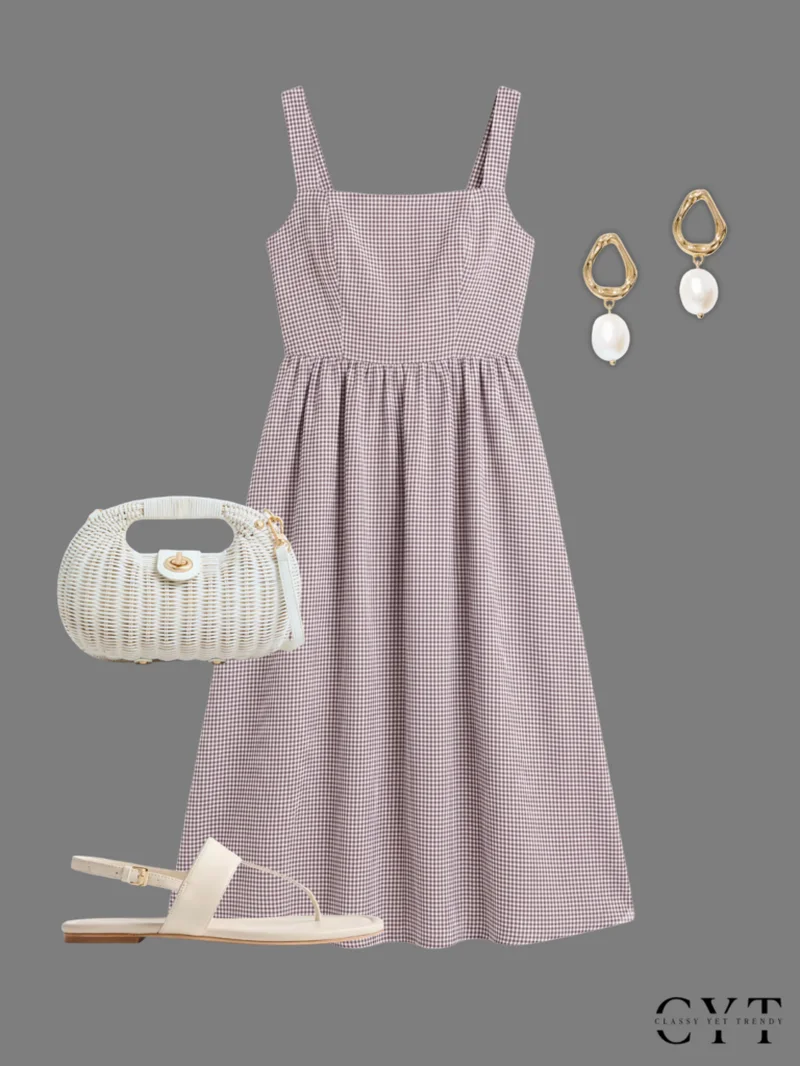
    Outfit 4: Fit-and-flare midi dress

    Fit-and-flare taupe brown midi dress for date night

    This one feels a bit more put-together — I’d wear it to a dinner date or anything that needs a slight step-up from everyday.

    • European Linen Fit & Flare Midi Dress in “taupe brown gingham”
    • Pearl Sculptural Drop Earrings
    • Moda Luxe Esme Bag in “white”
    • T-strap Sandals in “bone”

    Outfit 5: Ribbed tee with pleated trousers

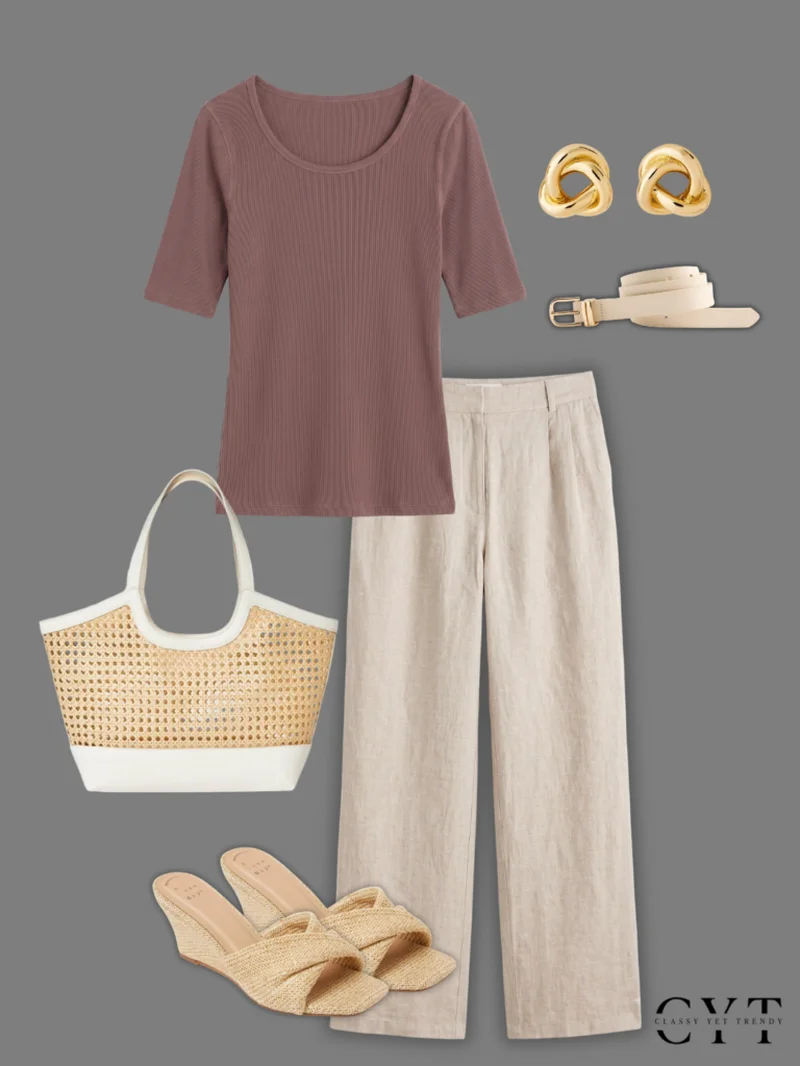
    Taupe brown ribbed tee with flax pleated trousers

    The most work-ready look on the list. Pleated trousers in flax and a taupe brown tee — it reads as polished without being stiff.

    • Organic Cotton Micro-Rib Elbow Sleeve Tee in “taupe brown”
    • European Linen Pleated Trouser in “flax”
    • Gold Knot Earrings
    • Gold Buckle Belt in “dusty ivory”
    • Straw Caning Tote Bag
    • Wedge Sandals in “natural”

    Outfit 6: Smocked midi dress for weekend ease

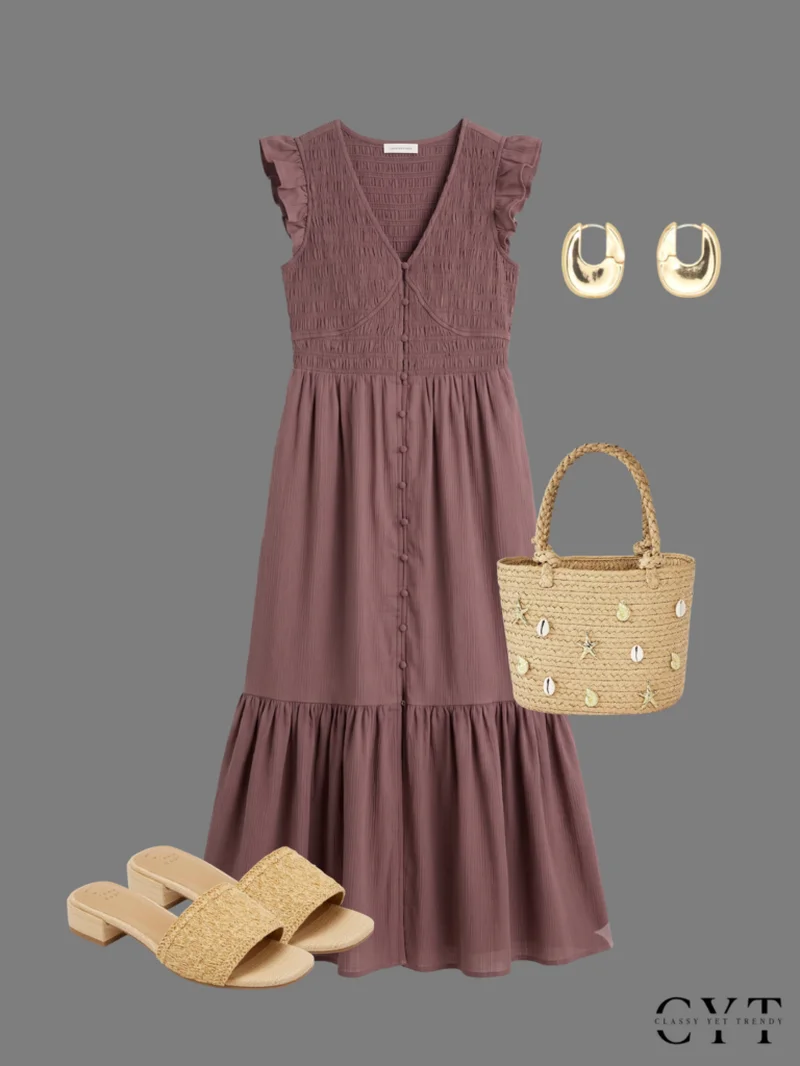
    Smocked V-neck taupe cotton midi dress weekend look

    The simplest outfit and the one I probably wear most often. A smocked bodice means no fussy fitting, and taupe brown on cotton always looks softer than it sounds.

    • Cotton Smocked V-Neck Midi Dress in “taupe brown”
    • Gold Hoop Earrings
    • Straw Embellished Mini Tote
    • Grace Sandals with Memory Foam Insole

    Frequently Asked Questions

    Is taupe brown hard to match with other colors?

    Not at all. It pairs well with white, cream, flax, denim, and even brighter summer tones like coral or olive. The key is keeping accessories in warm undertones.

    Can taupe brown work for people who usually wear black?

    Yes — think of it as a warmer, lighter alternative that still grounds an outfit. If you miss the contrast black gives, add darker leather accents like the chocolate belt in Outfit 1.

    Where can I shop these pieces?

    All items are from Quince unless noted otherwise (Amazon for sandals). You can also browse the full collection on their site.

    A note from Ava: I used to think taupe was just “muted brown” and nothing exciting. Once I started wearing it in summer, I realized it’s one of those colors that makes everything else look better — including you.

    Looking for more neutral wardrobe ideas? Check out My Capsule Wardrobe Essentials Under $50 and How to Build a Summer Capsule With Just 10 Pieces.

    Keep Reading

  • Hidden Back-to-School Costs Parents Forget to Budget For

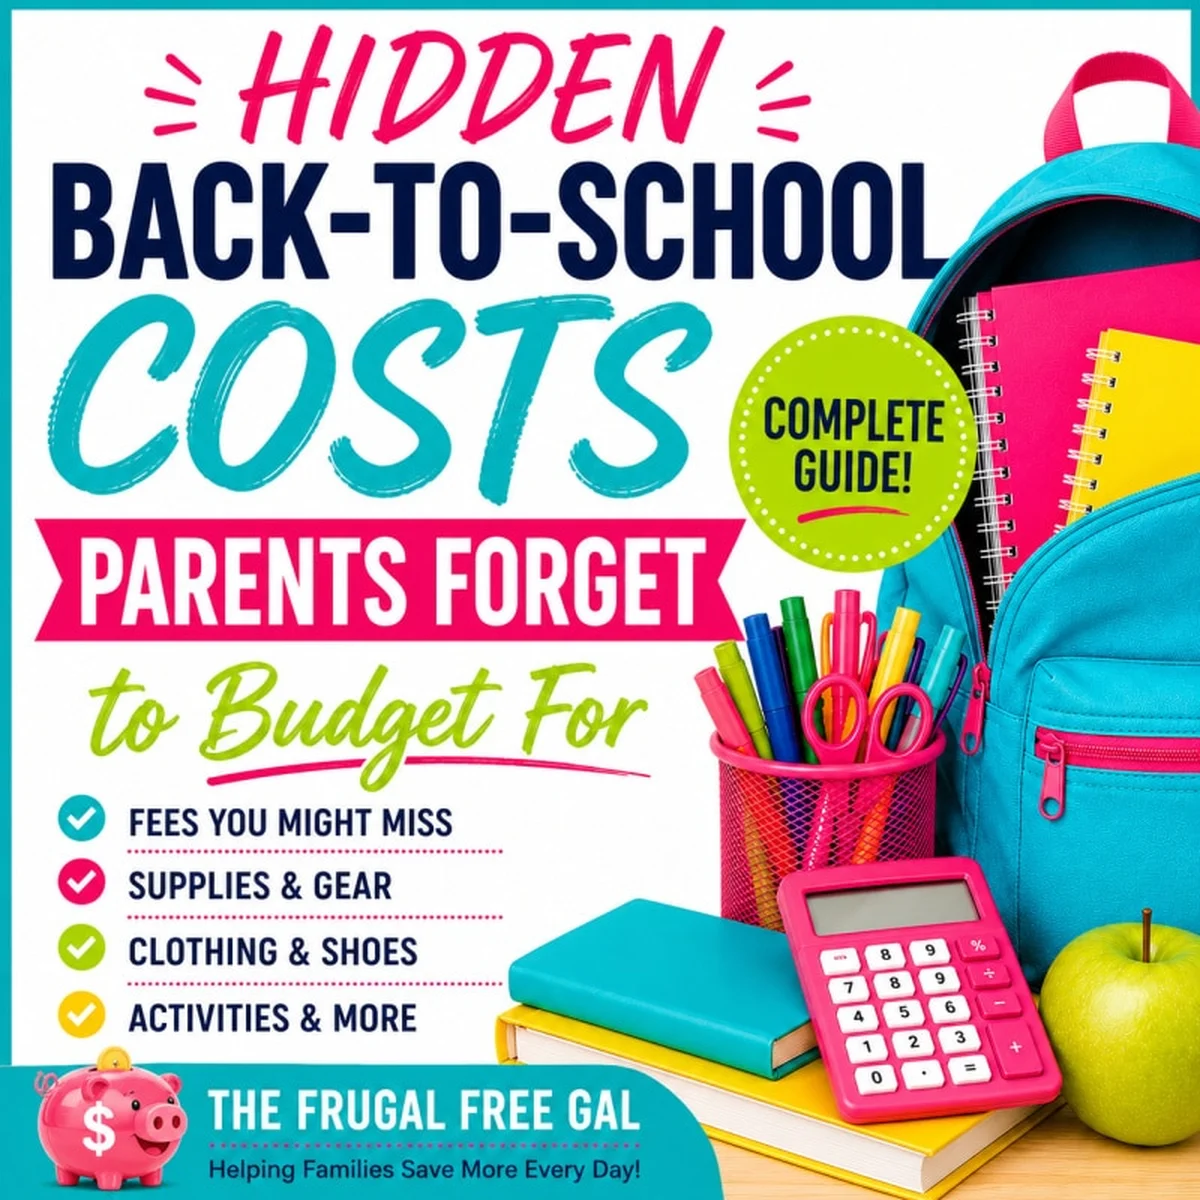
    Hidden Back-to-School Costs Parents Forget to Budget For

    It was mid-August last year, and I had just finished buying backpacks and school clothes for my niece when a permission slip came through the mail with a field trip fee due next week. We were already over budget — but that wasn’t even the last one. Sports registration in September, book fair money in October, and then prom season for my cousin’s senior year out of nowhere in March.

    If you are planning back-to-school right now, you probably have notebooks and pencils on your list. But most families don’t realize the expenses that strain a school-year budget rarely show up on the official supply sheet. Registration fees, classroom projects, school pictures, field trips, sports, technology costs — they arrive month by month, quietly adding up.

    The good news: these aren’t actually surprises. They’re just easy to overlook. A little planning before the year begins can help you avoid last-minute stress and feel more confident when new expenses pop up.

    Why Back-to-School Costs Happen All Year Long

    A lot of parents assume school spending peaks in July and August. In reality, it’s spread across the entire year. Knowing roughly when each expense shows up makes it much easier to budget for.

    Before school starts (July–August): This is the biggest upfront stretch — registration fees, technology or device fees, backpacks, lunch boxes, water bottles, school clothes and shoes, haircuts, uniforms, PE kits, parking permits for high schoolers, locker fees, required calculators, teacher wish list items.

    Early fall (September–October): School pictures arrive first. Then book fairs, fundraisers, classroom projects, field trips, sports registration, club dues, band or choir expenses, team snacks, and classroom party requests.

    Late fall & winter (November–February): Holiday parties, gift exchanges, teacher appreciation events, winter sports, concert attire, school plays, Spirit Week, homecoming, classroom donations, and replacement supplies for things that broke or disappeared over break.

    Spring (March–May): Spring pictures, more field trips, state testing supplies like calculators and headphones, science fair projects, end-of-year parties, awards and sports banquets, yearbooks, teacher appreciation gifts, and for high schoolers: prom, cap and gown, graduation announcements.

    Year-round: Lunch money, classroom snacks, replacement supplies, technology repairs, lost library books, fines, last-minute projects, team meals, spirit wear, club activities, and unexpected teacher requests.

    Required School Fees

    School fees are one of the biggest expenses parents overlook. Supplies and clothes get all the attention, but many schools charge additional fees before the first day. Depending on your child’s school and grade level, these may cover enrollment, technology, classroom materials, or student activities.

    Common fees include registration and operational fees, enrollment fees, technology or Chromebook device fees, device insurance plans, student activity fees, lab fees, art or music fees, elective course fees, career and technical education program fees, dual enrollment fees, parking permits for high schoolers, locker fees, student planner fees, ID replacement fees, required calculator purchases, graduation fees, senior dues, and optional PTA/PTO or booster club memberships.

    Review your school’s fee schedule as soon as it’s available. Ask whether payment plans are offered for larger fees, and check if your school provides fee waivers for qualifying families.

    School Supplies — and the Ones You Replace

    Most families buy everything on the supply list in August but don’t expect to shop again until next year. Pencils disappear, notebooks fill up, glue sticks dry out, headphones stop working. By December you’re back at the store.

    In addition to your child’s required list, plan for replacement items throughout the year: pencils and pens, erasers, highlighters, crayons and colored pencils, markers (regular and dry erase), glue sticks and liquid glue, scissors, loose-leaf paper, notebooks and composition books, folders, binders with dividers, pencil pouches and sharpeners, index cards, sticky notes, construction paper, printer paper and ink, headphones or earbuds, calculators and calculator batteries, USB flash drives, water bottles, lunch boxes with ice packs, backpacks.

    Shop back-to-school sales and grab a few extra basics while prices are low. Keep them in a labeled bin so you always have replacements on hand — it saves both money and stress when your child says they need something the night before it’s due.

    School Clothes, Shoes, and Personal Items

    Buying school clothes is one of the biggest expenses for many families, especially if kids grew over the summer. Most parents budget for new outfits but miss the smaller purchases that add up: socks, undergarments, belts, rain jackets, winter coats, hats and gloves, hair accessories.

    Clothing costs can continue throughout the year as seasons change or special events require different outfits. Shop end-of-season sales, check secondhand stores for gently used clothing and uniforms, buy a few versatile pieces instead of replacing an entire wardrobe, and look into uniform exchanges through your school or PTA.

    Technology and Digital Learning

    Many schools provide Chromebooks, tablets, or laptops, but families cover accessories, repairs, and replacements. A lost charger or cracked screen costs more than a protective case.

    Budget for: Chromebook insurance, device protection plans, repair costs, replacement chargers and cables, power adapters, protective cases and laptop sleeves, headphones and earbuds, wireless mouse, stylus pens, USB flash drives, graphing calculators and batteries, printer paper and ink, webcams if needed, educational apps or software subscriptions, home internet upgrades, and fees for lost or damaged devices.

    School Pictures and Yearbooks

    Photo expenses don’t stop after the first week of school. You’ll see order forms for spring pictures, sports team photos, band or choir pictures, club photos, graduation portraits, senior portraits, cap and gown portraits, yearbooks (including personalized versions), digital photo packages, and frames or albums.

    Most are optional. Decide ahead of time which keepsakes matter most to your family so you can budget accordingly. Ask grandparents if they’d like to purchase their own photo packages as gifts — it takes the pressure off.

    Classroom Projects and Special Assignments

    Science fair displays, book reports, family trees, last-minute craft projects — none of these make it onto a back-to-school shopping list. Each purchase seems small, but they add up fast if you have more than one child.

    Keep a project box at home stocked with poster board, tri-fold presentation boards, foam board, construction paper, cardstock, printer paper and ink, color printing supplies, glue sticks, tape, scissors, markers, colored pencils, paint and brushes, modeling clay, popsicle sticks, pipe cleaners, cotton balls, googly eyes, fabric, ribbon, stickers, batteries, science fair materials, and craft storage containers.

    Teacher Wish Lists and Classroom Donations

    Teachers spend their own money to stock classrooms. Schools often send home wish lists asking families for items that benefit the entire class — tissues, paper towels, disinfecting wipes, hand sanitizer, zip-top bags, copy paper, construction paper, dry erase markers, pencils, crayons, markers, glue sticks, sticky notes, index cards, classroom books, treasure box prizes, snacks, bottled water, flexible seating donations, organization bins, seasonal decorations.

    Most requests are optional. Donate what comfortably fits your budget instead of feeling pressured to buy everything. Splitting a larger wish list item with another family also works well.

    Lunches, Snacks, and Food Expenses

    School lunches account deposits, packed lunch supplies, refillable water bottles, juice boxes, lunch containers and ice packs add up before you notice. Then there are classroom snacks, birthday treats, field trip lunches, sports team snacks, club refreshments, concession stand money at events, teacher appreciation breakfasts or lunches.

    Plan school lunches as part of your weekly meal plan. Buy lunchbox snacks in bulk when they’re on sale, prepare homemade snacks instead of individually packaged options, and pack a small supply of shelf-stable items for last-minute requests.

    Book Fairs, Reading Programs, and Library

    Scholastic book fairs, classroom book clubs, required reading books, summer reading lists, library fines, lost or damaged library books — these create unexpected expenses if you haven’t planned for them.

    Set a spending limit before each book fair. Visit your local library before purchasing required reading titles, and shop used bookstores for books your child gets to keep.

    Field Trips

    Museums, zoos, aquariums, science centers, historical sites, performances — the admission fee is often just one part. Budget also for transportation or bus fees, packed lunches, drinks and snacks, souvenirs, spending money, special clothing or shoes, sunscreen, rain gear, parent chaperone admission, parking fees, gas, and for overnight trips: hotel accommodations and meals.

    Set aside a small amount each month so permission slips don’t catch you off guard. Pack lunches and reusable water bottles whenever possible.

    Sports, Clubs, and Extracurricular Activities

    Registration fees are just the beginning. Throughout the season there are uniforms, practice clothes, athletic shoes or cleats, socks, helmets, pads and protective equipment like mouth guards and shin guards, gloves, equipment bags, sports physicals, team photos, snacks and meals, tournament or competition fees, travel expenses including gas and parking, booster club dues, fundraisers, spirit wear, end-of-season banquets, and coach appreciation gifts.

    For band, choir, and music: instrument rental or purchase, repairs, cleaning supplies, reeds, valve oil, drumsticks, sheet music, music folders, concert attire, performance shoes, uniform rental, honor band auditions, solo and ensemble fees, competition fees, performance travel, and private lessons.

    Theater, dance, and cheer add costs for costumes and alterations, cast or team apparel, makeup, hair accessories, dance or cheer shoes, leotards, tights, warm-up outfits, competition fees, recital fees, performance tickets, cast parties, banquets, and travel.

    Academic clubs have dues too — student council, National Honor Society, robotics, debate, Science Olympiad, Academic Decathlon, DECA, HOSA, TSA, Future Farmers of America, 4-H, SkillsUSA, FCCLA, BPA. Plus competition registration, conferences, travel, hotels, meals, project supplies, and team apparel.

    Ask for a complete list of expected season costs before your child commits. Budget for the full season, not just the registration fee. Carpool to practices and games whenever possible.

    School Spirit and Special Events

    Spirit weeks, themed dress-up days, assemblies, dances, family nights, and fundraisers build school pride — but each one has a cost. Budget for spirit shirts, grade-level or club shirts, homecoming shirts, fundraiser shirts, Spirit Week costumes, themed outfits, crazy sock days, hat day donations, pajama day clothing, dance tickets, homecoming attire with corsages and boutonnieres, carnival tickets, family fun nights, movie nights, talent show fees, play and concert tickets, awards banquet tickets, and school merchandise.

    Reuse clothing for themed days. Shop your own closets first, then try thrift stores for inexpensive one-time items. Borrow or swap with friends and family when you can.

    Classroom Parties and Holiday Celebrations

    Halloween treats, Thanksgiving feast donations, winter party supplies, Valentine’s Day cards and treat bags, individually wrapped candy, spring celebrations, end-of-year class parties, field day supplies, birthday treats, craft supplies, juice boxes, bottled water, paper plates, cups, napkins, plastic utensils, decorations, teacher appreciation week items.

    Buy Valentine’s cards and party supplies after each holiday and save them for next year. Purchase multipacks of paper goods when they’re on sale. Sign up to bring one or two items instead of volunteering for everything.

    High School and Senior Year

    High school expenses tend to increase, not decrease. Budget for parking permits and decals, student parking fees, school-issued laptops, elective course fees, CTE program fees, dual enrollment textbooks and course fees, graduation fees, senior dues, cap and gown, graduation announcements and invitations, thank-you cards, senior portraits, yearbooks including personalized versions and ads.

    College and testing costs: ACT registration, SAT registration, AP exam fees, CLEP exam fees, college application fees, transcript request fees, campus visits, orientation expenses.

    Senior events: homecoming tickets and attire, prom tickets with formal wear, shoes and accessories, hair and makeup appointments, corsages and boutonnieres, senior trip, class ring, letter jacket, graduation party with decorations and gifts.

    Start saving for senior year before your child reaches high school. Shop secondhand for prom attire and borrow or rent formal wear whenever possible.

    Last-Minute Requests

    No matter how well you plan, some expenses arrive unexpectedly: poster board at the last minute, printer ink running out overnight, batteries needed before a project deadline, glue sticks, tape, markers, construction paper, index cards, craft supplies, white T-shirts for class activities, black pants for performances, cash for classroom activities, replacement permission slip fees, teacher-requested supplies, lost headphones, emergency snacks, gift bags and wrapping supplies, flowers or appreciation gifts for teachers and coaches.

    Keep a small emergency school fund in your monthly budget. Stock common project materials at home before they’re needed.

    Create a School Sinking Fund

    A sinking fund is simply money you set aside over time for expected future expenses. Instead of scrambling each time a new cost appears, save consistently throughout the year.

    Here’s how to start:

    • Estimate your annual school expenses using this guide.
    • Add up the total across all your children.
    • Divide by 12 months.
    • Set aside that amount each month in a separate savings account, envelope, or budgeting category.
    • Use the money only for school-related expenses.

    You don’t have to save hundreds of dollars each month. Even setting aside $20 to $50 can cover many smaller surprises — registration fees, field trips, sports, school pictures, classroom projects. The key is building the habit before the next expense arrives.

    Your Annual School Budget Checklist

    Use this as a planning tool each summer:

    • Before school starts: registration and student fees, school supplies and replacements, backpacks, lunch boxes, water bottles, clothes, shoes, haircuts, technology accessories, teacher wish list items
    • Throughout the year: lunches, classroom snacks, school pictures, book fairs, projects, field trips, sports and extracurricular activities, club dues, spirit events, parties, holiday celebrations, teacher appreciation events, technology repairs, replacement supplies, last-minute requests
    • High school: parking permits, ACT/SAT registration, AP exam fees, dual enrollment expenses, homecoming, prom, senior dues, cap and gown, graduation announcements, senior portraits, class ring, yearbooks
    • Budgeting reminders: add to your sinking fund monthly, watch for tax-free shopping weekends, shop clearance sales for next year’s supplies, visit thrift stores for clothes and Spirit Week outfits, borrow or swap specialty items with friends and family, keep a project supply bin stocked, plan ahead for seasonal parties, leave room for surprises

    Frequently Asked Questions

    How much should I budget for back-to-school expenses?

    Every family’s total differs based on your child’s age, school requirements, activities, and whether you need new clothes or technology. This guide can help you estimate a realistic number instead of being caught off guard month by month.

    What are the biggest hidden back-to-school costs?

    Registration fees, operational fees, school pictures, field trips, book fairs, classroom projects, sports and clubs, Spirit Week, classroom parties, technology expenses, and senior year costs. Most seem small individually but add up quickly over a full school year.

    What is a school sinking fund?

    A school sinking fund is money you save throughout the year for future school expenses. Set aside $20 to $50 each month and use it only for school-related costs — registration fees, field trips, sports, pictures, projects, and more.

    I started keeping a small project box at home last year — glue sticks, markers, poster board, tape, scissors, construction paper. It sounds simple, but having those basics on hand has saved me so many midnight runs to the store when something is due tomorrow.

    School memories aren’t created by buying everything. They’re created by being prepared enough to enjoy the moments without worrying about the next expense.

    — Ava

    Related posts you might like: